
 About Linux For All (LFA) Build 200607
The system is based on Ubuntu 20.04 LTS and Debian. It’s a total rebuild. I.e. nothing is left of the old LFA system.
Why Ubuntu 20.04 LTS?
Ubuntu 20.04 is supported until April 2025.
NEWS ABOUT LFA Build 200607
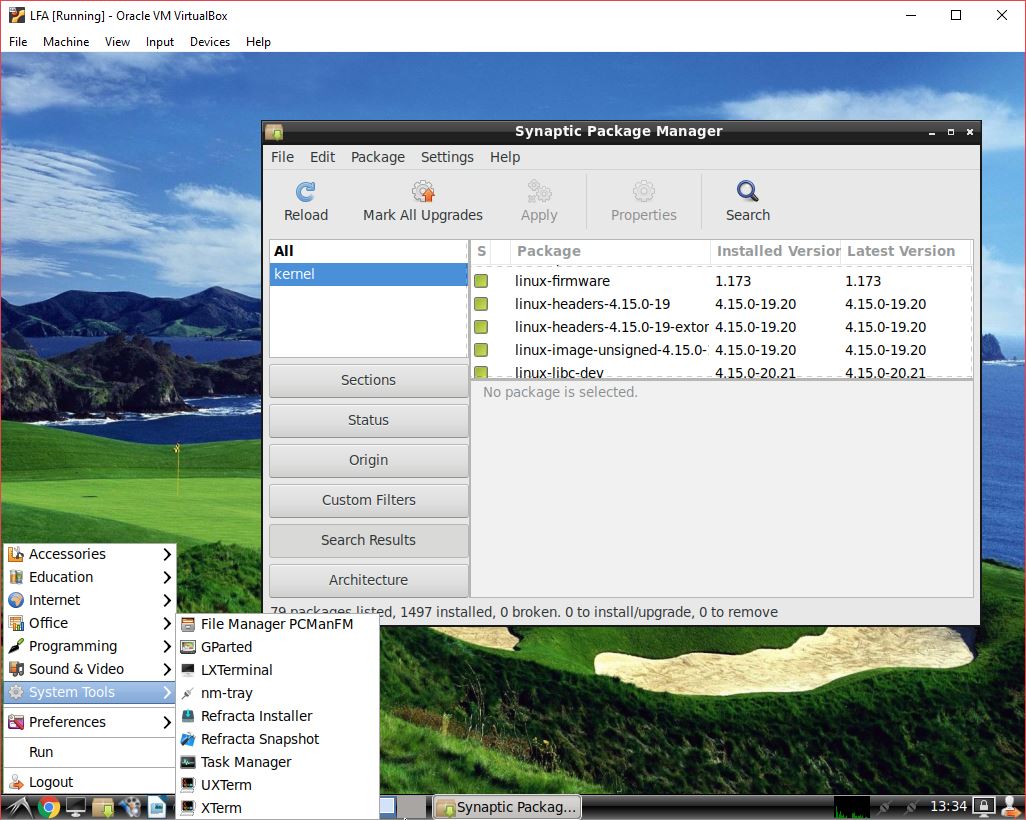
1. This is a BIG system (1670 MB). All packages the ordinary Linux user can wish for are pre-installed. Study the full packages list.
2. Kernel 5.7.0-exton is used.
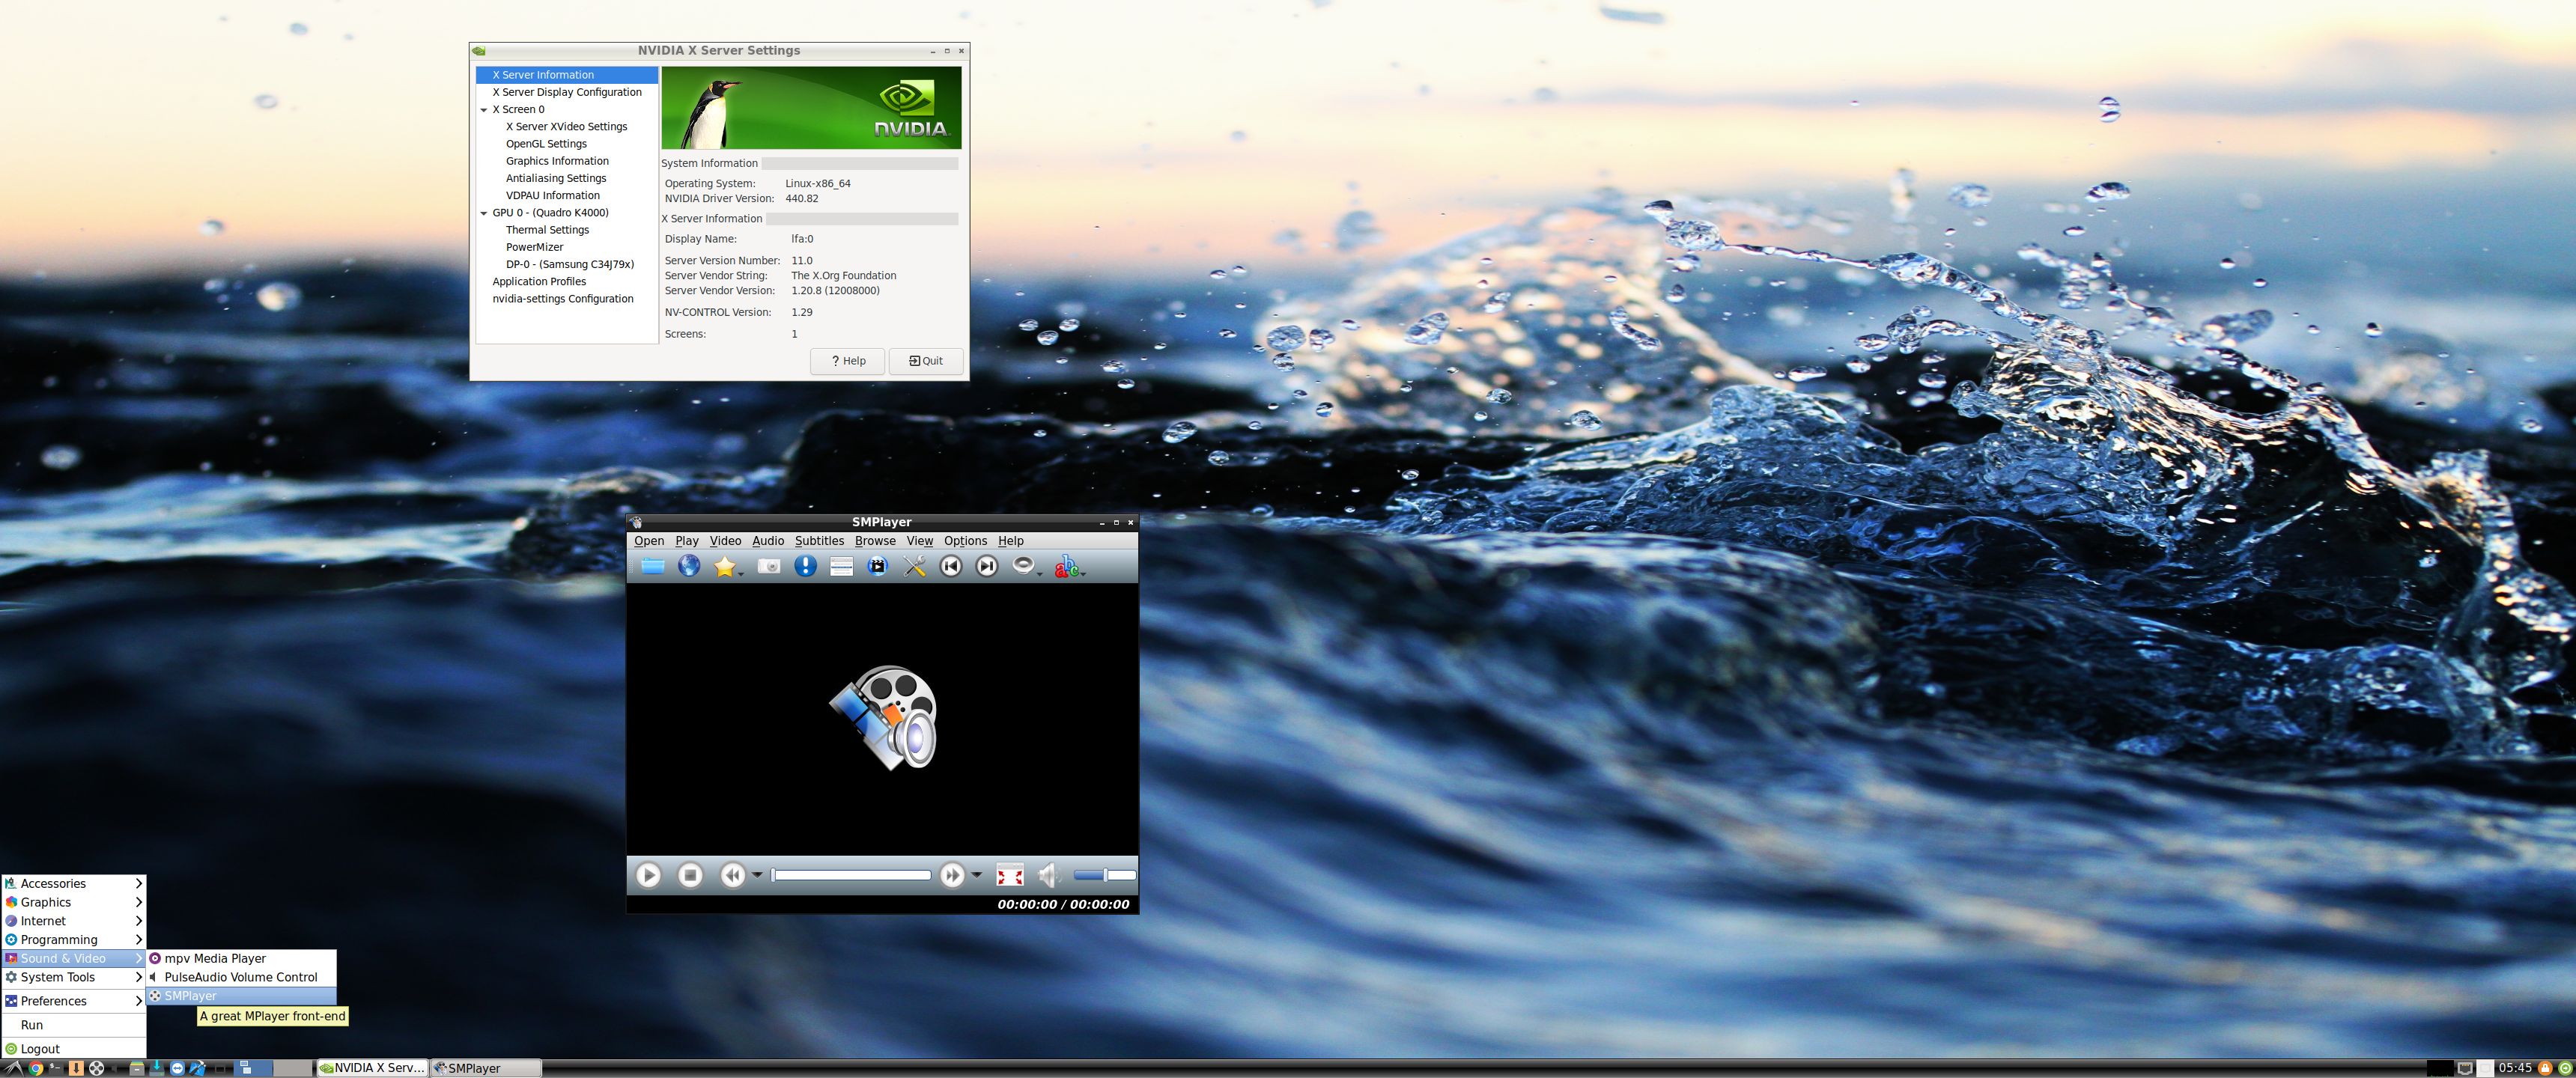
3. I have installed Nvidia’s latest proprietary graphics driver 440.82.
4. The Desktop environment is LXDE – Designed to be user friendly and slim, while keeping the resource usage low.
5. The main Web Browser is Google Chrome. So you can watch Netflix! Another advantage with Google Chrome is that you will get all your bookmarks if you log in with your Gmail account.
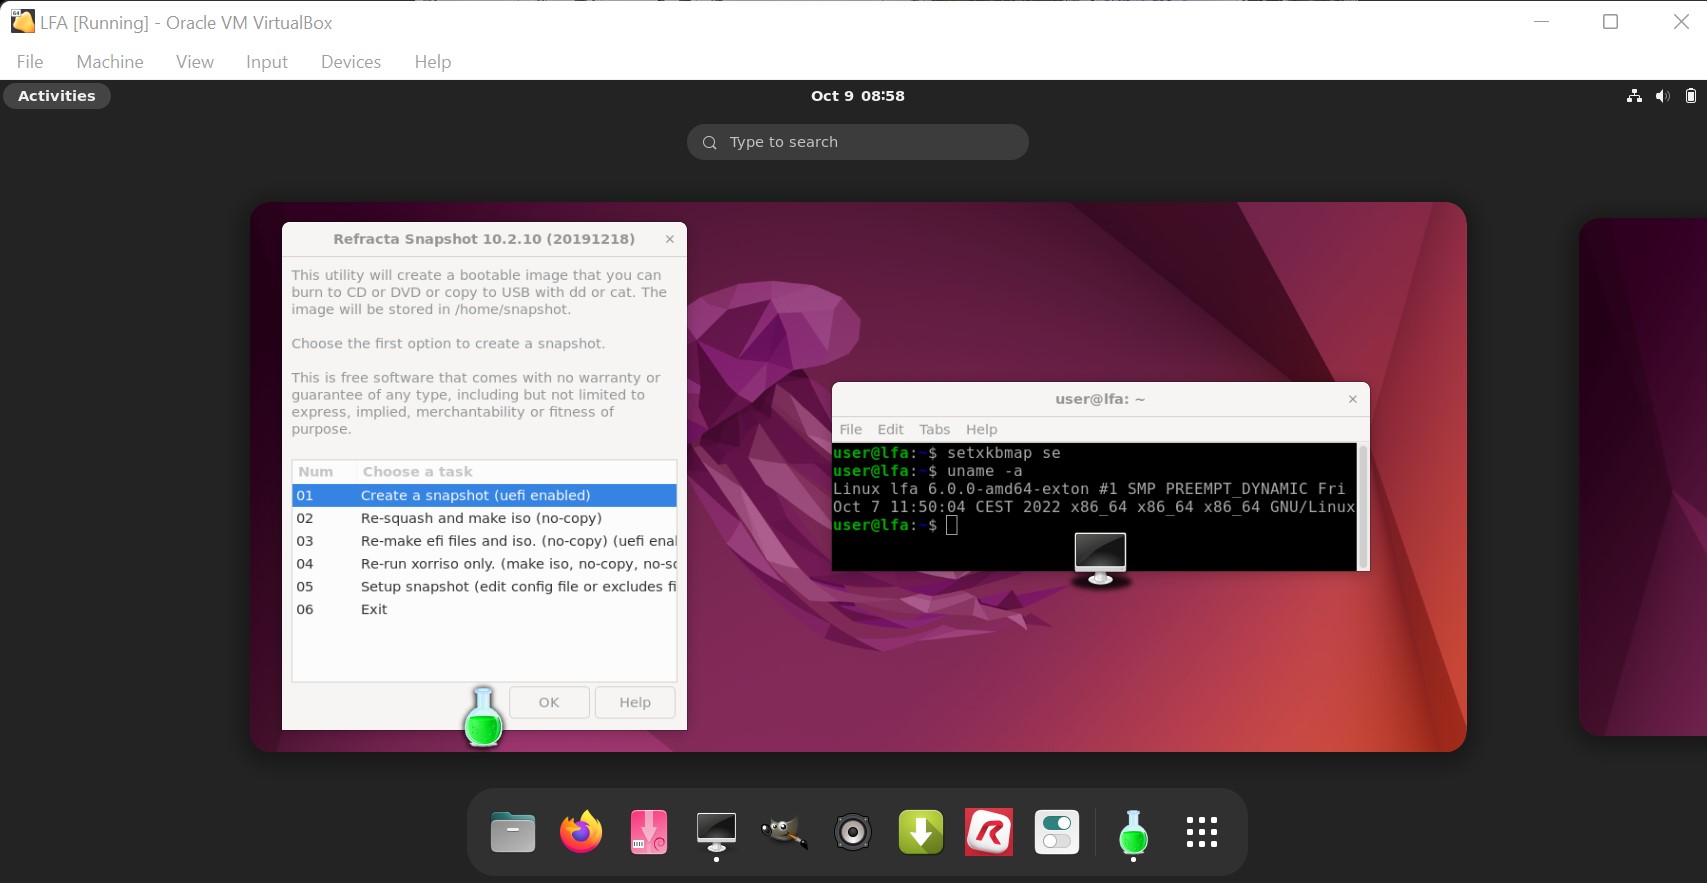
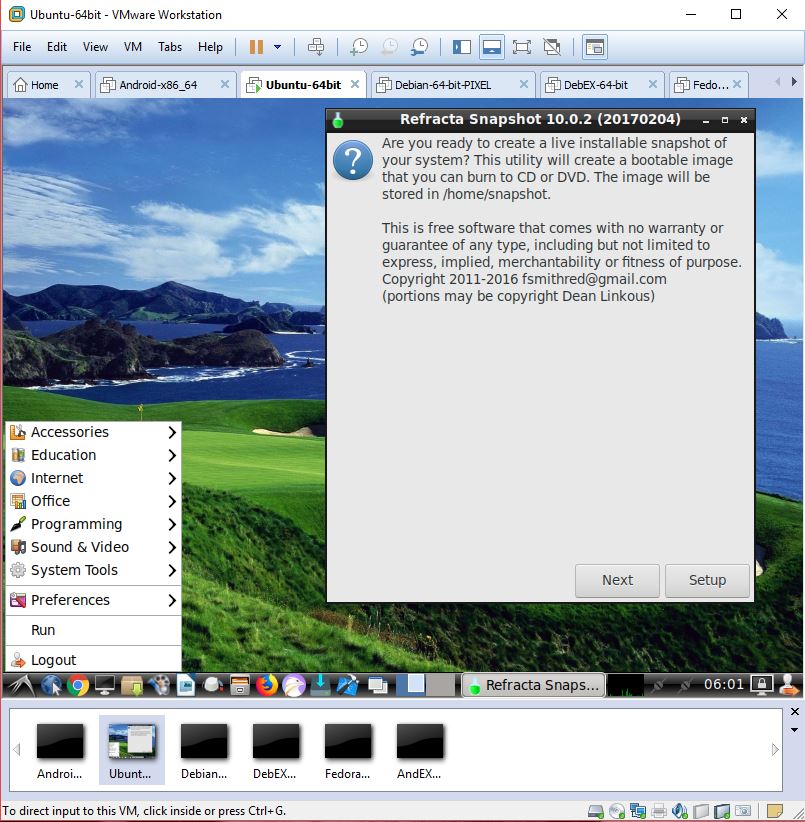
6. I have included Refracta tools (Refracta Snapshot) to make it possible for you to create your own installable Ubuntu 20.04 LTS Live DVD once you have installed LFA to hard drive. This is done in the easiest possible way!
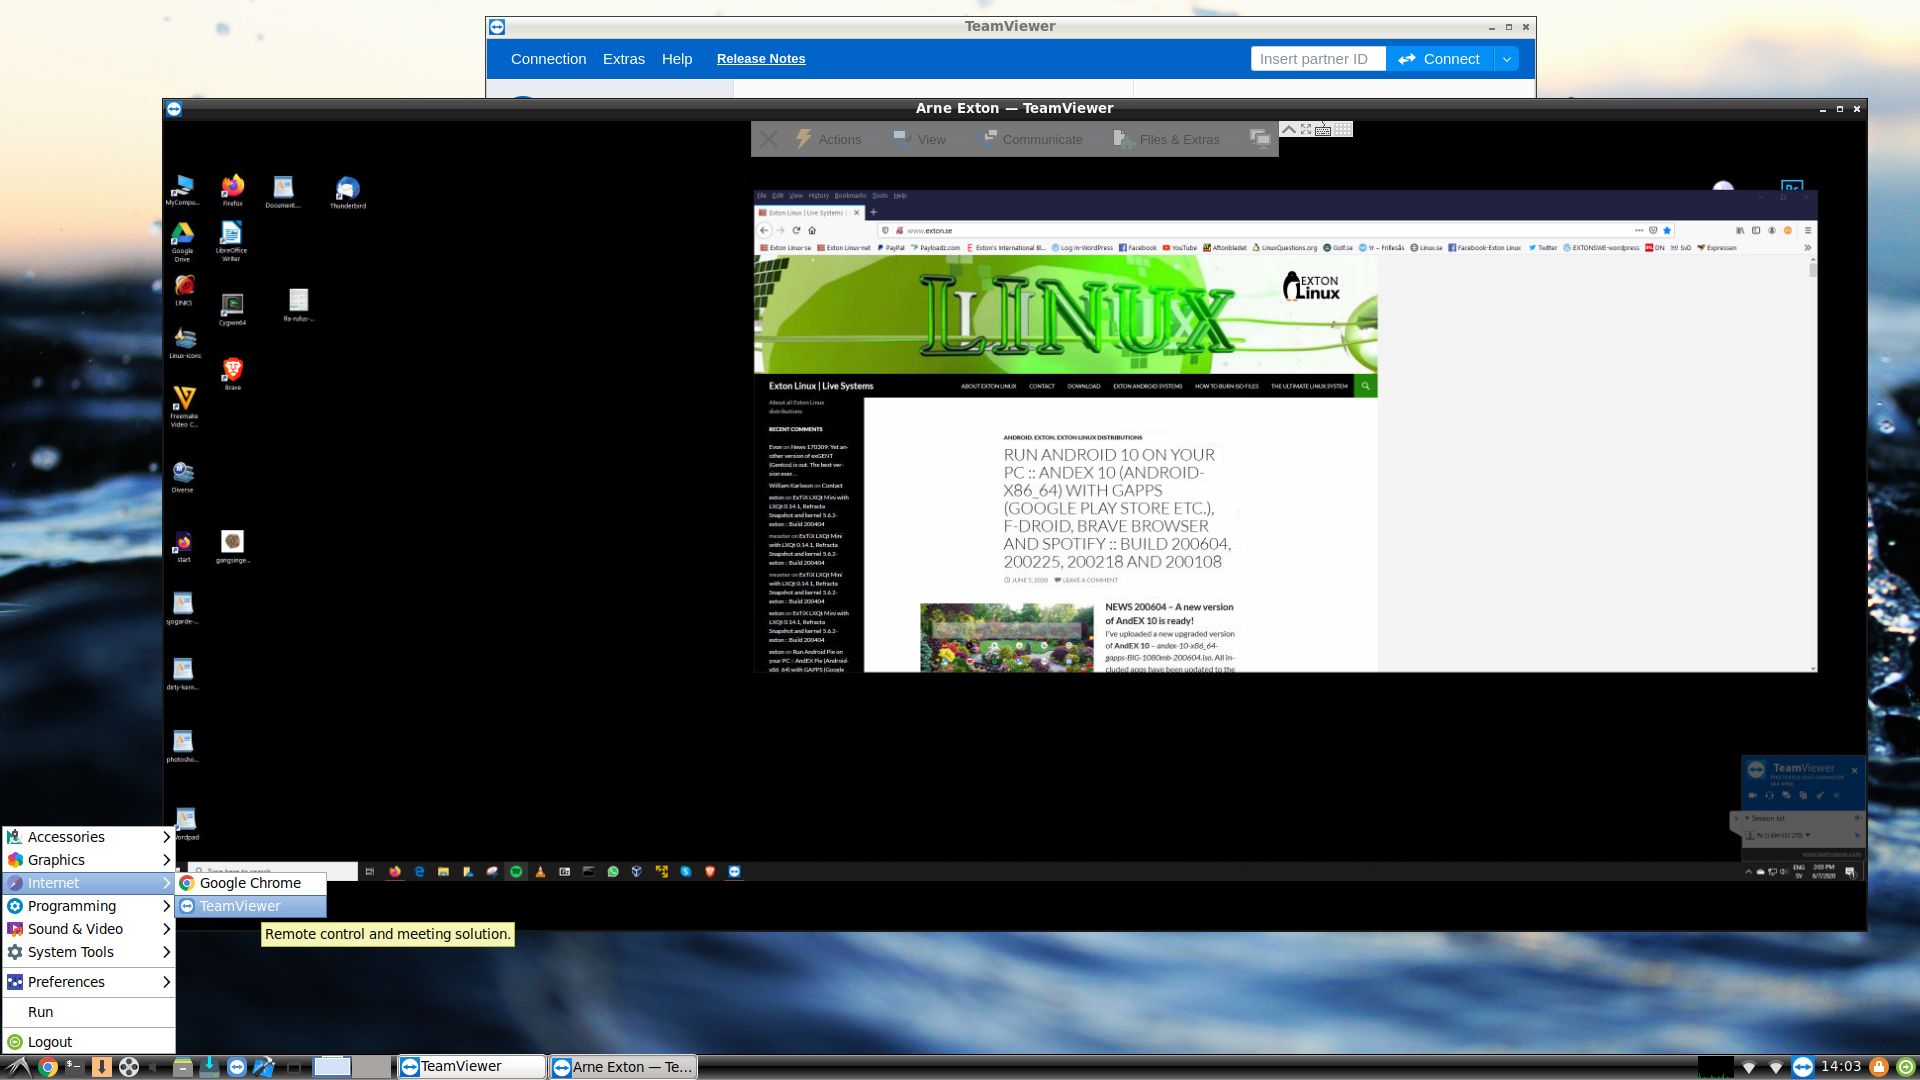
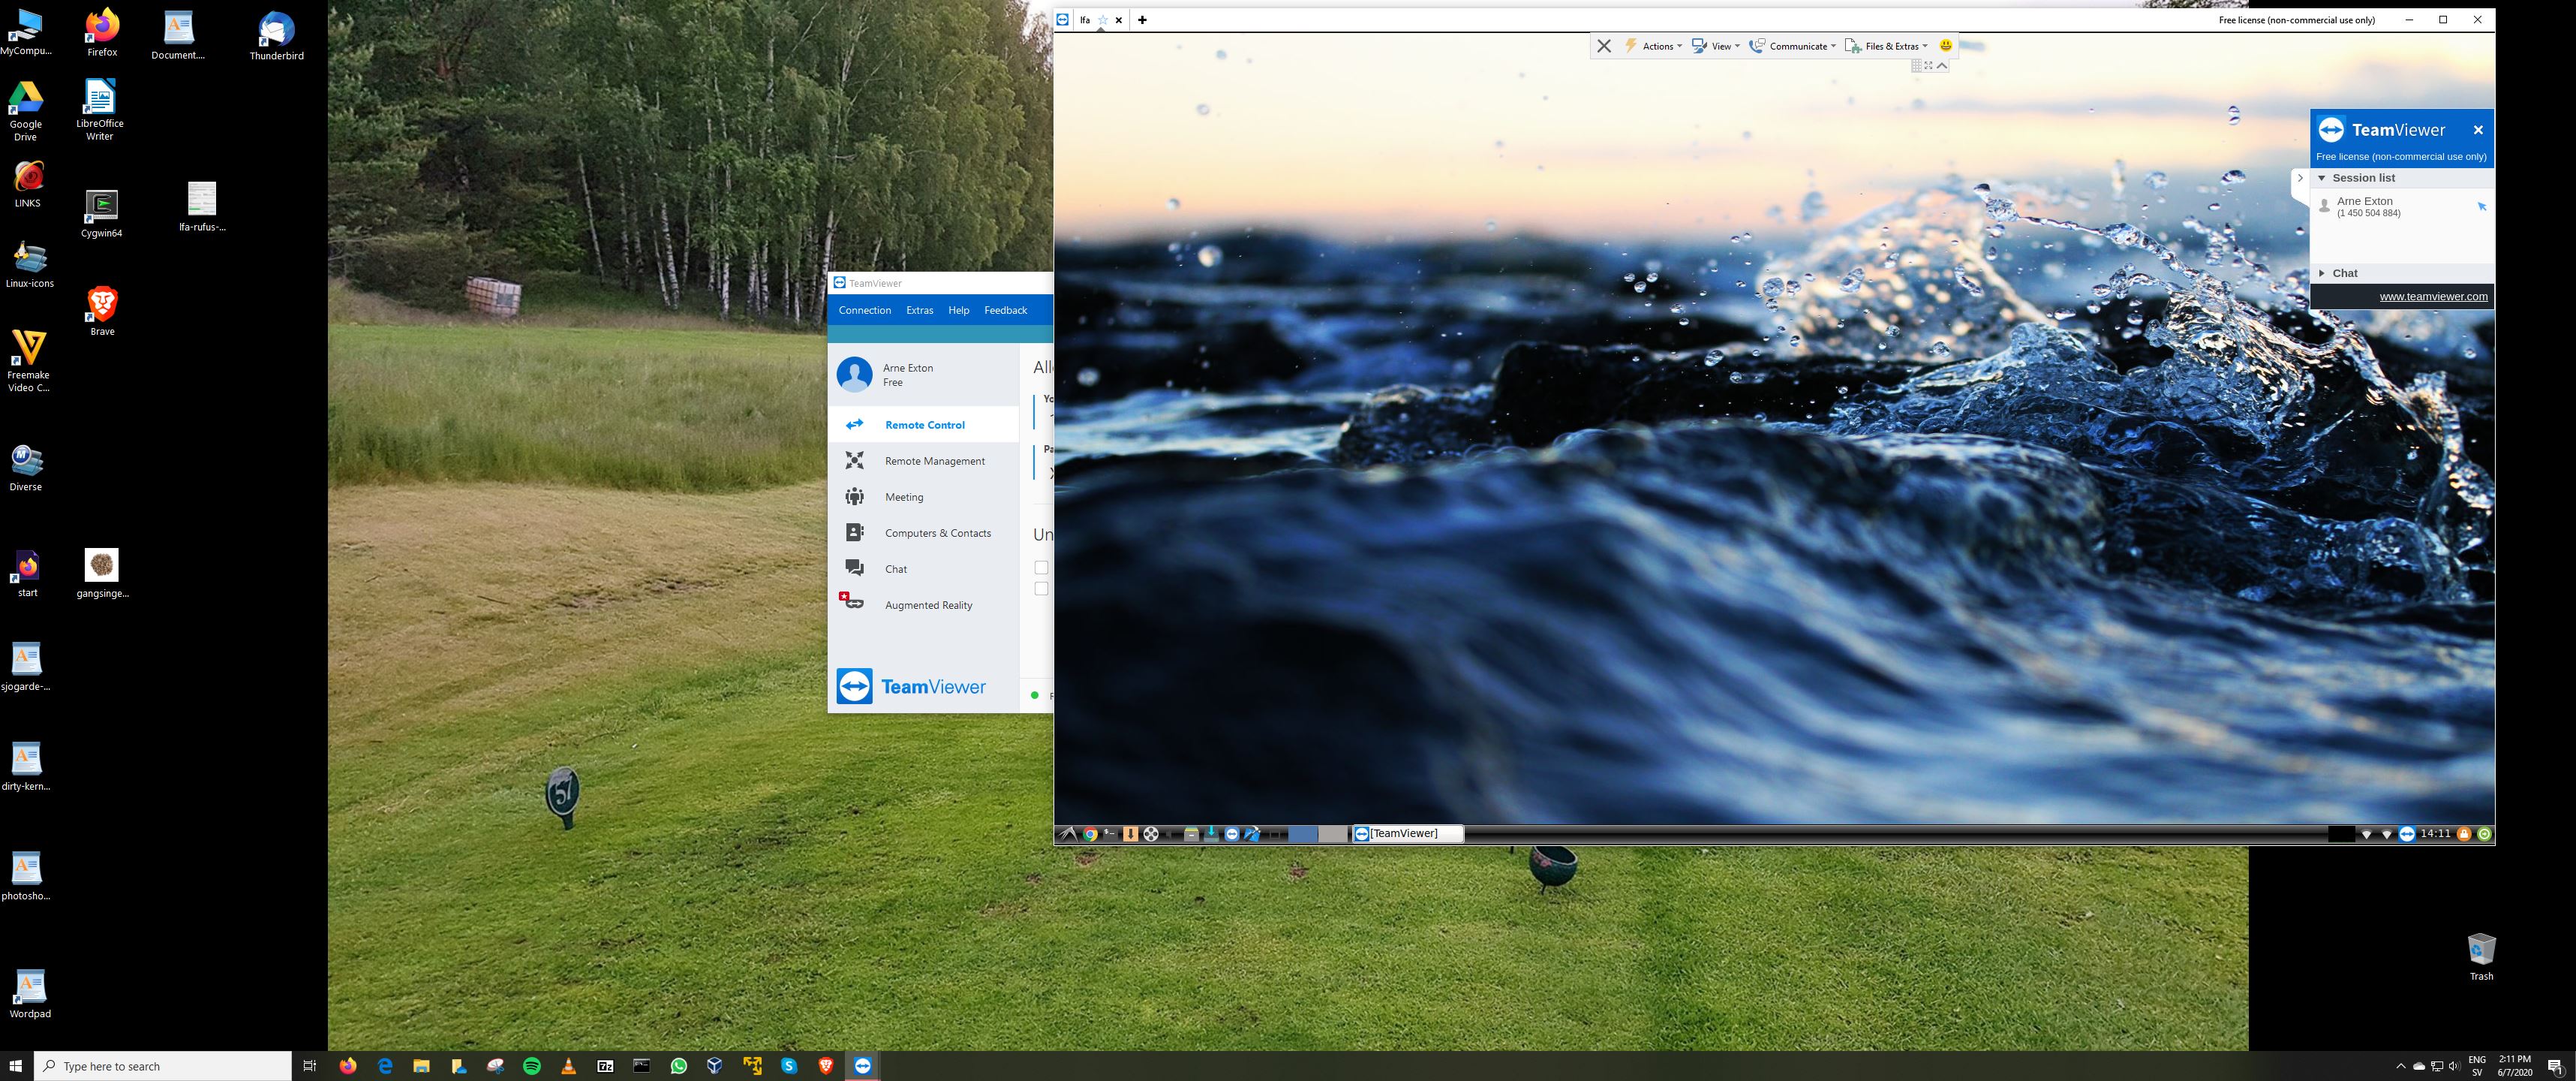
7. Use TeamViewer (pre-installed) to control your Windows computers from LFA. Or control LFA from your Windows computers.
Log in to LXDE
When the boot process is ready you will end up at LightDM’s login screen. Log in as the ordinary user live with password live. You can’t log in to LXDE as root (superadmin) from LightDM. The password for root is root. When logged in as live you can use Sudo to become root. (Command: sudo su). If you for some reason still want to run LFA as root you can do it by pressing Ctrl Alt F1 simultaneously. Log in as root with password root. Then run startx.
Using TeamViewer
Use TeamViewer (pre-installed) to control your Windows computers from LFA. Or control LFA from your Windows computers.
Screenshot 1 – LFA “running” Windows 10
Screenshot 2 – Windows 10 “running” LFA
How to use TeamViewer – A Complete Guide…
Installation to hard drive
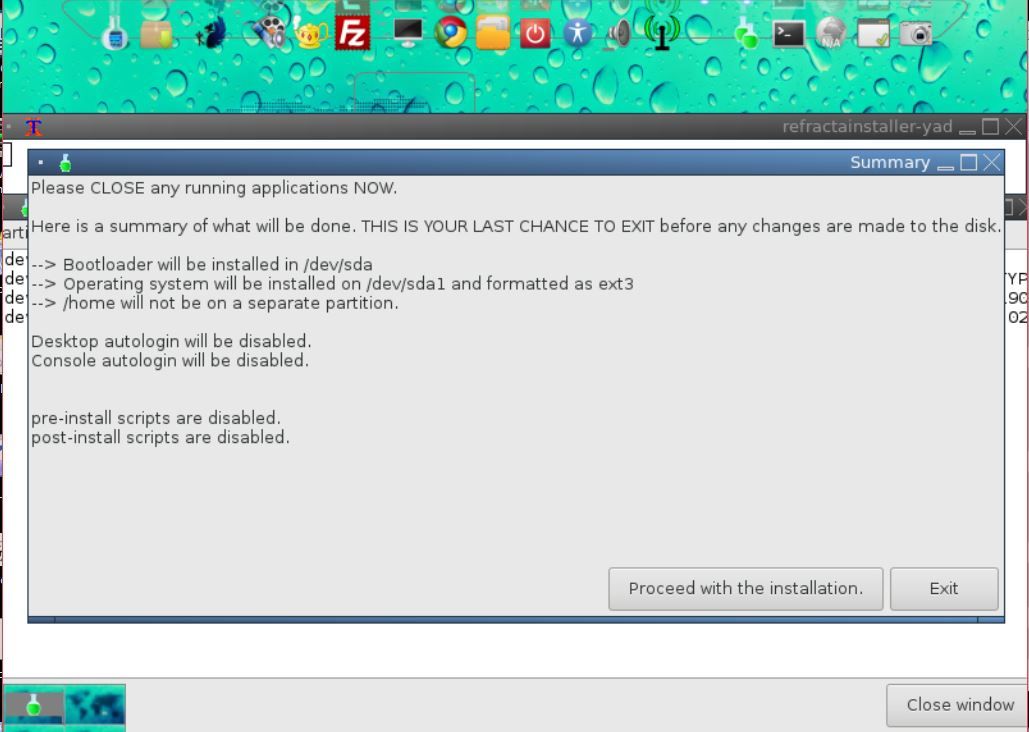
Note that you in advance (just in case) should create a partition of at least 20 GB for LFA and a SWAP space double the size of your computer’s RAM. I.e. if you have RAM of 1024 MB or less. If you have RAM of 2 GB or more it’s enough with a SWAP space of 2 GB. The installation program Refracta Installer in LFA is otherwise “intuitive”. Choose manual partitioning and select the partition you created in advance for installation. You’ll find the installation program under Menu (LXDE) >> System Tools >> Refracta Installer. NOTE: You should format your intended installation partition in advance. You can use GParted (installed in LFA) for that. Be sure to unmount all partitions before you start Refracta Installer. READ MORE about a hard drive install…
USB installation
Please read my INSTRUCTION about the best way to perform a USB installation.
Important about Refracta
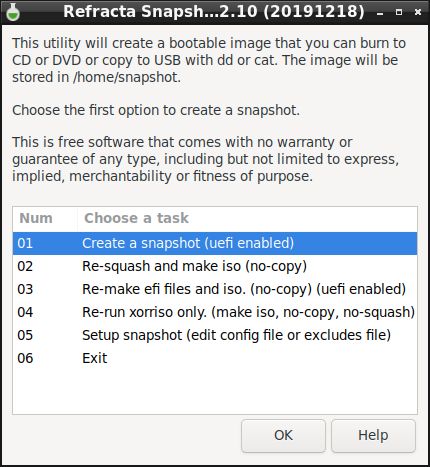
You can use the Refracta Snapshot (pre-installed in LFA Build 200607) to create your own installable Ubuntu 20.04 LTS Live DVD once you have installed LFA to hard drive. I mean change everything and then create a whole new Ubuntu live system. When you start Refracta Snapshot it will look like this. You don’t even have to install LFA to hard drive before you can use the Refracta Snapshot. If you have plenty of RAM you can create a new (your own!) Ubuntu live installable system while running LFA from DVD or a USB stick. Please note that the whole Refracta Snapshot process (creating your new ISO) will only take 10 – 30 min! You can then install VirtualBox in LFA so you can test run your own created new Ubuntu ISO. Or do it in Windows. Btw: You can do the whole thing in VirtualBox. I mean install LFA in VirtualBox, change everything, create a new Ubuntu system using Refracta tools and transfer your new ISO to your server with FileZilla or Samba. Or just copy your new ISO file to a USB stick. NOTE: In this LFA build you may have to use Refracta Snapshot in three steps before your new ISO is ready in /home/snapshot. See the first three (01 – 03) steps below.
Using the Nvidia proprietary driver
If you want (and can) use Nvidia’s proprietary graphics driver 440.82 you shall boot up LFA using boot alternative 4 (fail-safe). Then open up a terminal and run sudo nvidia-xconfig. Log out. NOTE: Maybe you don’t even have to run the command nvidia-xconfig. I.e. your Nvidia card will be used automatically. Check that by starting Nvidia X Server Settings under Menu (LXDE) >> Preferences. If you can’t reach X/LXDE after running nvidia-xconfig etc. your card isn’t supported. Delete xorg.conf with sudo rm /etc/X11/xorg.conf and run the command startx. Or reboot your computer.
SCREENSHOTS
Screenshot 1 – LFA running Windows 10 with TeamViewer
Screenshot 2 – Windows 10 running LFA with TeamViewer
Screenshot 3 – Running Nvidia Settings
Screenshot 4 – Synaptic running
Screenshot 5 – LFA running in VMware
Screenshot 6 – LFA running in VirtualBox
Screenshot 7 – LFA running Samba to reach Windows computers
DOWNLOAD
This version of LFA has been replaced by version 211018…
and
about my Android 11, 10, Pie, Oreo, Nougat, Marshmallow and Lollipop versions for Raspberry Pi 4 and 3/2 at raspex.exton.se – latest is RaspAnd 11 (with GAPPS) and RaspAnd Oreo 8.1 (also with GAPPS)!