Tag Archives: create your own LFA/Ubuntu live dvd

LFA (Linux For All) 64bit Build 200607 with LXDE, TeamViewer, Google Chrome, Nvidia 400.82, Refracta Snapshot and kernel 5.7.0-exton

About Linux For All (LFA) Build 200607
The system is based on Ubuntu 20.04 LTS and Debian. It’s a total rebuild. I.e. nothing is left of the old LFA system.

Why Ubuntu 20.04 LTS?
Ubuntu 20.04 is supported until April 2025.

NEWS ABOUT LFA Build 200607

1. This is a BIG system (1670 MB). All packages the ordinary Linux user can wish for are pre-installed. Study the full packages list.
2. Kernel 5.7.0-exton is used.
3. I have installed Nvidia’s latest proprietary graphics driver 440.82.
4. The Desktop environment is LXDEDesigned to be user friendly and slim, while keeping the resource usage low.
5. The main Web Browser is Google Chrome. So you can watch Netflix! Another advantage with Google Chrome is that you will get all your bookmarks if you log in with your Gmail account.
6. I have included Refracta tools (Refracta Snapshot) to make it possible for you to create your own installable Ubuntu 20.04 LTS Live DVD once you have installed LFA to hard drive. This is done in the easiest possible way!
7. Use TeamViewer (pre-installed) to control your Windows computers from LFA. Or control LFA from your Windows computers.

What’s new in kernel 5.7?

Log in to LXDE
When the boot process is ready you will end up at LightDM’s login screen. Log in as the ordinary user live with password live. You can’t log in to LXDE as root (superadmin) from LightDM. The password for root is root. When logged in as live you can use Sudo to become root. (Command: sudo su). If you for some reason still want to run LFA as root you can do it by pressing Ctrl Alt F1 simultaneously. Log in as root with password root. Then run startx.

Using TeamViewer
Use TeamViewer (pre-installed) to control your Windows computers from LFA. Or control LFA from your Windows computers.
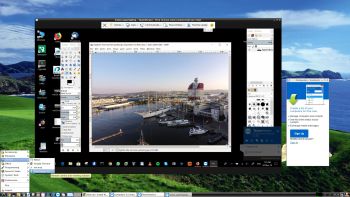
Screenshot 1 – LFA “running” Windows 10
Screenshot 2 – Windows 10 “running” LFA
How to use TeamViewer – A Complete Guide…

Installation to hard drive

Note that you in advance (just in case) should create a partition of at least 20 GB for LFA and a SWAP space double the size of your computer’s RAM. I.e. if you have RAM of 1024 MB or less. If you have RAM of 2 GB or more it’s enough with a SWAP space of 2 GB. The installation program Refracta Installer in LFA is otherwise “intuitive”. Choose manual partitioning and select the partition you created in advance for installation. You’ll find the installation program under Menu (LXDE) >> System Tools >> Refracta Installer. NOTE: You should format your intended installation partition in advance. You can use GParted (installed in LFA) for that. Be sure to unmount all partitions before you start Refracta Installer. READ MORE about a hard drive install…

USB installation
Please read my INSTRUCTION about the best way to perform a USB installation.

Important about Refracta
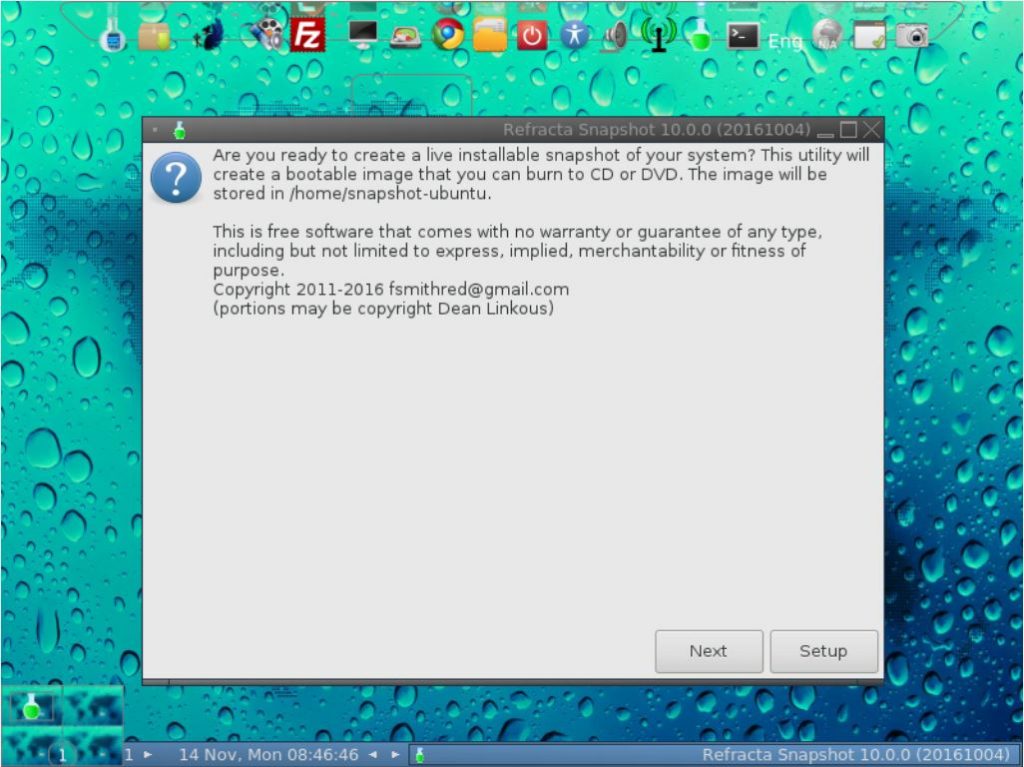
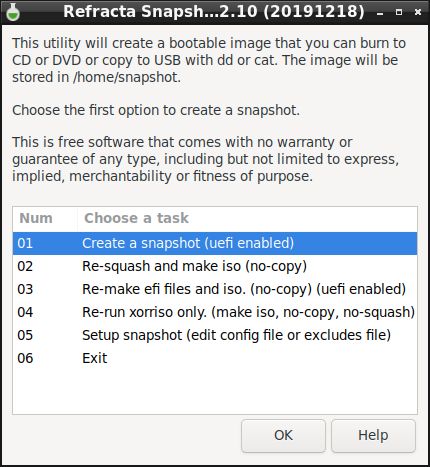
You can use the Refracta Snapshot (pre-installed in LFA Build 200607) to create your own installable Ubuntu 20.04 LTS Live DVD once you have installed LFA to hard drive. I mean change everything and then create a whole new Ubuntu live system. When you start Refracta Snapshot it will look like this. You don’t even have to install LFA to hard drive before you can use the Refracta Snapshot. If you have plenty of RAM you can create a new (your own!) Ubuntu live installable system while running LFA from DVD or a USB stick. Please note that the whole Refracta Snapshot process (creating your new ISO) will only take 10 – 30 min! You can then install VirtualBox in LFA so you can test run your own created new Ubuntu ISO. Or do it in Windows. Btw: You can do the whole thing in VirtualBox. I mean install LFA in VirtualBox, change everything, create a new Ubuntu system using Refracta tools and transfer your new ISO to your server with FileZilla or Samba. Or just copy your new ISO file to a USB stick. NOTE: In this LFA build you may have to use Refracta Snapshot in three steps before your new ISO is ready in /home/snapshot. See the first three (01 – 03) steps below.


Using the Nvidia proprietary driver

If you want (and can) use Nvidia’s proprietary graphics driver 440.82 you shall boot up LFA using boot alternative 4 (fail-safe). Then open up a terminal and run sudo nvidia-xconfig. Log out. NOTE: Maybe you don’t even have to run the command nvidia-xconfig. I.e. your Nvidia card will be used automatically. Check that by starting Nvidia X Server Settings under Menu (LXDE) >> Preferences. If you can’t reach X/LXDE after running nvidia-xconfig etc. your card isn’t supported. Delete xorg.conf with sudo rm /etc/X11/xorg.conf and run the command startx. Or reboot your computer.

SCREENSHOTS
Screenshot 1 – LFA running Windows 10 with TeamViewer
Screenshot 2 – Windows 10 running LFA with TeamViewer
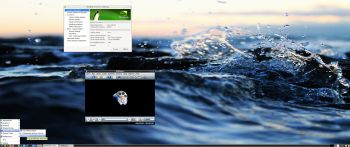
Screenshot 3 – Running Nvidia Settings
Screenshot 4 – Synaptic running
Screenshot 5 – LFA running in VMware
Screenshot 6 – LFA running in VirtualBox
Screenshot 7 – LFA running Samba to reach Windows computers

DOWNLOAD
This version of LFA has been replaced by version 211018…

Read about my Android-x86 Systems – 10, Pie, Oreo, Nougat, Marshmallow, Lollipop and KitKat at andex.exton.net – latest is AndEX 10 (with GAPPS) and AndEX Pie 9.0 (also with GAPPS)!
and
about my Android 11, 10, Pie, Oreo, Nougat, Marshmallow and Lollipop versions for Raspberry Pi 4 and 3/2 at raspex.exton.se – latest is RaspAnd 11 (with GAPPS) and RaspAnd Oreo 8.1 (also with GAPPS)!

LFA (Linux For All) 64bit Build 191111 with LXDE, TeamViewer, Google Chrome, Refracta Snapshot and kernel 5.4.0-rc6-exton

About Linux For All (LFA) Build 191111
The system is based on Ubuntu 18.04.3 LTS and Debian. It’s a total rebuild. I.e. nothing is left of the old LFA system.

Why Ubuntu 18.04.3 LTS?
Ubuntu 18.04 is supported until April 2023. Ubuntu 19.10 is supported until July 2020 only.

NEWS ABOUT LFA Build 191111

1. This is a very BIG system (2120MB). All packages the ordinary Linux user can wish for are pre-installed. Study the full packages list.
2. Kernel 5.4.0-rc6-exton is used.
3. I have installed Nvidia’s latest proprietary graphics driver 440.31.
4. The Desktop environment is LXDEDesigned to be user friendly and slim, while keeping the resource usage low.
5. The main Web Browser is Google Chrome. So you can watch Netflix! Another advantage with Google Chrome is that you will get all your bookmarks if you log in with your Gmail account.
6. I have included Refracta tools (Refracta Snapshot) to make it possible for you to create your own installable Ubuntu 18.04.3 LTS Live DVD once you have installed LFA to hard drive. This is done in the easiest possible way!
7. Use TeamViewer (pre-installed) to control your Windows computers from LFA. Or control LFA from your Windows computers.

What’s new in kernel 5.4?

Log in to LXDE
When the boot process is ready you will end up at LightDM’s login screen. Log in as the ordinary user live with password live. You can’t log in to LXDE as root (superadmin) from LightDM. The password for root is root. When logged in as live you can use Sudo to become root. (Command: sudo su). If you for some reason still want to run LFA as root you can do it by pressing Ctrl Alt F1 simultaneously. Log in as root with password root. Then run startx.

Using TeamViewer
Use TeamViewer (pre-installed) to control your Windows computers from LFA. Or control LFA from your Windows computers.
Screenshot 1 – LFA “running” Windows 10
Screenshot 2 – Windows 10 “running” LFA
How to use TeamViewer – A Complete Guide…

Installation to hard drive

Note that you in advance (just in case) should create a partition of at least 8 GB for LFA and a SWAP space double the size of your computer’s RAM. I.e. if you have RAM of 1024 MB or less. If you have RAM of 2 GB or more it’s enough with a SWAP space of 2 GB. The installation program Refracta Installer in LFA is otherwise “intuitive”. Choose manual partitioning and select the partition you created in advance for installation. You’ll find the installation program under Menu (LXDE) >> System Tools >> Refracta Installer. NOTE: You should format your intended installation partition in advance. You can use GParted (installed in LFA) for that. Be sure to unmount all partitions before you start Refracta Installer. READ MORE about a hard drive install…

USB installation
Please read my INSTRUCTION about the best way to perform a USB installation.

Important about Refracta
You can use the Refracta Snapshot (pre-installed in LFA Build 191111) to create your own installable Ubuntu 18.04.3 LTS Live DVD once you have installed LFA to hard drive. I mean change everything and then create a whole new Ubuntu live system. When you start Refracta Snapshot it will look like this. You don’t even have to install LFA to hard drive before you can use the Refracta Snapshot. If you have plenty of RAM you can create a new (your own!) Ubuntu live installable system while running LFA from DVD or a USB stick. Please note that the whole Refracta Snapshot process (creating your new ISO) will only take 10 – 30 min! You can then install VirtualBox in LFA so you can test run your own created new Ubuntu ISO. Or do it in Windows. Btw: You can do the whole thing in VirtualBox. I mean install LFA in VirtualBox, change everything, create a new Ubuntu system using Refracta tools and transfer your new ISO to your server with FileZilla or Samba. Or just copy your new ISO file to a USB stick.

Using the Nvidia proprietary driver

If you want (and can) use Nvidia’s proprietary graphics driver 440.31 you shall boot up LFA using boot alternative 4 (fail-safe). Then open up a terminal and run sudo nvidia-xconfig. Log out. NOTE: Maybe you don’t even have to run the command nvidia-xconfig. I.e. your Nvidia card will be used automatically. Check that by starting Nvidia X Server Settings under Menu (LXDE) >> Preferences. If you can’t reach X/LXDE after running nvidia-xconfig etc. your card isn’t supported. Delete xorg.conf with sudo rm /etc/X11/xorg.conf and run the command startx. Or reboot your computer.

SCREENSHOTS
Screenshot 1 – LFA “running” Windows 10 with TeamViewer
Screenshot 2 – Windows 10 “running” LFA with TeamViewer
Screenshot 3 – LFA running in VMware
Screenshot 4 – LFA running in VirtualBox
Screenshot 5 – Refracta Installer and Grub/efi
Screenshot 6 – LFA running Samba to reach Windows computers
Screenshot 7 – LFA running Google Chrome and Netflix
Screenshot 8 – TeamViewer setup in LFA
Screenshot 9 – Running Nvidia Settings

DOWNLOAD
This version of LFA has been replaced by version 200607…


LFA (Linux For All) 64bit Build 180504 with LXDE, TeamViewer, Google Chrome and Refracta tools

About Linux For All (LFA) Build 180504
The system is based on Ubuntu 18.04 LTS and Debian. It’s a total rebuild. I.e. nothing is left of the old LFA system.

NEWS ABOUT LFA Build 180504
1. This is a very BIG system (2020MB). All packages the ordinary Linux user can wish for are pre-installed. Study the full packages list.
2. Kernel 4.15.0-19-exton is used.
3. I have installed Nvidia’s latest proprietary graphics driver 390.48.
4. The Desktop environment is LXDEDesigned to be user friendly and slim, while keeping the resource usage low.
5. The main Web Browser is Google Chrome. So you can watch Netflix!
6. I have included Refracta tools (Refracta Snapshot) to make it possible for you to create your own installable Ubuntu 18.04 LTS Live DVD once you have installed LFA to hard drive. This is done in the easiest possible way!
7. Use TeamViewer (pre-installed) to control your Windows computers from LFA. Or control LFA from your Windows computers.

Log in to LXDE
When the boot process is ready you will end up at LightDM’s login screen. Log in as the ordinary user live with password live. You can’t log in to LXDE as root (superadmin) from LightDM. The password for root is root. When logged in as live you can use Sudo to become root. (Command: sudo su). If you for some reason still want to run LFA as root you can do it by pressing Ctrl Alt F1 simultaneously. Log in as root with password root. Then run startx.

Using TeamViewer
Use TeamViewer (pre-installed) to control your Windows computers from LFA. Or control LFA from your Windows computers.
Screenshot 1 – LFA “running” Windows 10
Screenshot 2 – Windows 10 “running” LFA
How to use TeamViewer – A Complete Guide…

Installation to hard drive

Note that you in advance (just in case) should create a partition of at least 8 GB for LFA and a SWAP space double the size of your computer’s RAM. I.e. if you have RAM of 1024 MB or less. If you have RAM of 2 GB or more it’s enough with a SWAP space of 2 GB. The installation program Refracta Installer in LFA is otherwise “intuitive”. Choose manual partitioning and select the partition you created in advance for installation. You’ll find the installation program under Menu (LXDE) >> System Tools >> Refracta Installer. NOTE: You should format your intended installation partition in advance. You can use GParted (installed in LFA) for that. Be sure to unmount all partitions before you start Refracta Installer.  READ MORE about a hard drive install…

USB installation
Please read my INSTRUCTION about the best way to perform a USB installation.

Important about Refracta
You can use the Refracta Tools (pre-installed in LFA Build 180504) to create your own installable Ubuntu 18.04 LTS Live DVD once you have installed LFA to hard drive. I mean change everything and then create a whole new Ubuntu live system. When you start Refracta it will look like this. You don’t even have to install LFA to hard drive before you can use the Refracta tools. If you have plenty of RAM you can create a new (your own!) Ubuntu live installable system while running LFA from DVD or a USB stick. Please note that the whole Refracta process (creating your new ISO) will only take 10 – 30 min! You can then install VirtualBox in LFA so you can test run your own created new Ubuntu ISO. Or do it in Windows. Btw: You can do the whole thing in VirtualBox. I mean install LFA in VirtualBox, change everything, create a new Ubuntu system using Refracta tools and transfer your new ISO to your server with FileZilla. Or just copy your new ISO file to a USB stick.

Using the Nvidia proprietary driver

If you want (and can) use Nvidia’s proprietary graphics driver 390.48 you shall boot up LFA using boot alternative 4 (fail-safe). Then open up a terminal and run sudo nvidia-xconfig. Log out. NOTE: Maybe you don’t even have to run the command nvidia-xconfig. I.e. your Nvidia card will be used automatically. Check that by starting Nvidia X Server Settings under Menu (LXDE) >> Preferences. If you can’t reach X/LXDE after running nvidia-xconfig etc. your card isn’t supported. Delete xorg.conf with sudo rm /etc/X11/xorg.conf and run the command startx. Or reboot your computer. After a hard drive installation of LFA the open source driver Nouveau will be used, since it’s “built in” in the kernel. If you want and can use Nvidia’s proprietary graphics driver 390.48 you’ll have to run the command sudo nvidia-xconfig and restart your computer. You’ll also have to change /boot/grub/grub.cfg as this example shows.
menuentry ‘LFA :: GRUB :: (sda8)’ –class ubuntu –class gnu-linux –class gnu –class os $menuentry_id_option ‘gnulinux-simple-e150990b-5ae8-4f35-8d71-8118e682b5c7’ {
insmod gzio
insmod part_gpt
insmod ext2
set root=’hd0,gpt8′
if [ x$feature_platform_search_hint = xy ]; then
search –no-floppy –fs-uuid –set=root –hint-bios=hd0,gpt8 –hint-efi=hd0,gpt8 –hint-baremetal=ahci0,gpt8 e150990b-5ae8-4f35-8d71-8118e682b5c7
else
search –no-floppy –fs-uuid –set=root e150990b-5ae8-4f35-8d71-8118e682b5c7
fi
linux /boot/vmlinuz-4.15.0-19-exton root=UUID=e150990b-5ae8-4f35-8d71-8118e682b5c7 rw nomodeset
initrd /boot/initrd.img-4.15.0-19-exton
}

SCREENSHOTS
Screenshot 1 – LFA “running” Windows 10 with TeamViewer
Screenshot 2 – Windows 10 “running” LFA with TeamViewer
Screenshot 3 – LFA running in VMware
Screenshot 4 – LFA running in VirtualBox
Screenshot 5 – Refracta Installer and Grub/efi
Screenshot 6 – LFA running Samba to reach Windows computers
Screenshot 7 – LFA running Google Chrome and Netflix

DOWNLOAD
This version of LFA has been replaced by Build 191111.


Read about my Android-x86 Systems – Pie, Oreo, Nougat, Marshmallow, Lollipop and KitKat at

andex.exton.net – latest is AndEX Pie 9.0 (with GAPPS) and AndEX Oreo 8.1 (also with GAPPS)!

and about my Pie, Oreo, Nougat, Marshmallow and Lollipop versions for Raspberry Pi 3/2 at
raspex.exton.se – latest is RaspAnd Pie 9.0 (without GAPPS) and RaspAnd Oreo 8.1 (with GAPPS)!

LFA (Linux For All) 64bit Build 170827 with Wine (for HBO Movies/Nordic), Google Chrome (for Netflix) and Refracta tools

lfa-big-firefox-hbo-running-smallAbout Linux For All (LFA) Build 170827
The system is based on Ubuntu 16.04.3 LTS and Debian Jessie. It’s a total rebuild. I.e. nothing is left of the old LFA system.

NEWS ABOUT LFA Build 170827
1. This is a very BIG system (2430MB). All packages the ordinary Linux user can wish for are pre-installed. Study the full packages list.
2. Kernel 4.12.0-12-exton (corresponding Kernel.org’s second latest stable kernel 4.12.8) is used. You can download “my” kernel and install it in another Ubuntu/Debian system (if you want).
3. I have installed Nvidia’s latest proprietary graphics driver 384.69.
4. The Desktop environment is LXDEDesigned to be user friendly and slim, while keeping the resource usage low.
5. The main Web Browser is Google Chrome. So you can watch Netflix!
6. I have installed Wine just to be able to install Firefox for Windows (which I have done). The Windows version is needed if you want to watch HBO Movies/HBO Nordic. The Pepper Flash plugin just doesn’t work anymore in Ubuntu. With Wine installed you can install many other Windows programs using PlayOnLinux. (Also pre-installed by me).
7. I have included Refracta tools (Refracta Snapshot) to make it possible for you to create your own installable Ubuntu (16.04.3/16.10/17.04/17.10) Live DVD once you have installed LFA to hard drive. This is done in the easiest possible way!

Log in to LXDE
When the boot process is ready you will end up at Slim‘s login screen. Log in as the ordinary user live with password live or as root (superadmin) with password root. When logged in as live you can use Sudo to become root. (Command: sudo su).

Installation to hard drive
Note that you in advance (just in case) should create a partition of at least 8 GB for LFA and a SWAP space double the size of your computer’s RAM. I.e. if you have RAM of 1024 MB or less. If you have RAM of 2 GB or more it’s enough with a SWAP space of 2 GB. The installation program Refracta Installer in LFA is otherwise “intuitive”. Choose manual partitioning and select the partition you created in advance for installation. You’ll find the installation program under Menu (LXDE) >> System Tools >> Refracta Installer. NOTE: You should format your intended installation partition in advance. You can use GParted (installed in LFA) for that. Be sure to unmount all partitions before you start Refracta Installer.

USB installation
You should use UNetbootin in Windows or Linux. See a picture how it looks before the installation starts in Windows 10. There’s other ways to do it, but using UNetbootin is the best/safest way. However, if you want to install LFA to hard disk you will have to run the system from a DVD during installation. If you use Startup Disk Creator in Linux to transfer LFA to USB it is possible to install LFA to a hard drive later on from the USB stick. NOTE: Please read my INSTRUCTION about the best way to perform a USB installation.

Important about Refracta
You can use the Refracta Tools (pre-installed in LFA Build 170827) to create your own installable Ubuntu (16.04.3/16.10/17.04/17.10) Live DVD once you have installed LFA to hard drive. I mean change everything and then create a whole new Ubuntu live system. When you start Refracta it will look like this. You don’t even have to install LFA to hard drive before you can use the Refracta tools. If you have plenty of RAM you can create a new (your own!) Ubuntu live installable system while running LFA from DVD or a USB stick. Please note that the whole Refracta process (creating your new ISO) will only take 5 – 10 min! You can then install VirtualBox in LFA so you can test run your own created new Ubuntu ISO. Or do it in Windows. Btw: You can do the whole thing in VirtualBox. I mean install LFA in VirtualBox, change everything, create a new Ubuntu system using Refracta tools and transfer your new ISO to your server with FileZilla. Or just copy your new ISO file to a USB stick.

Using the Nvidia proprietary driver

If you want (and can) use Nvidia’s proprietary graphics driver 384.69 you shall boot up LFA using boot alternative 4 (Start in compatibility mode). Then open up a terminal and run sudo nvidia-xconfig. Log out. NOTE: Maybe you don’t even have to run the command nvidia-xconfig. I.e. your Nvidia card will be used automatically. Check that by starting Nvidia X Server Settings under Menu (LXDE) >> Preferences. If you can’t reach X/LXDE after running nvidia-xconfig etc. your card isn’t supported. Delete xorg.conf with sudo rm /etc/X11/xorg.conf and run the command startx. Or reboot your computer. After a hard drive installation of LFA the open source driver Nouveau will be used, since it’s “built in” in the kernel. If you want and can use Nvidia’s proprietary graphics driver 384.69 you’ll have to run the command sudo nvidia-xconfig and restart your computer. You’ll also have to change /boot/grub/grub.cfg as this example shows.
menuentry ‘LFA :: GRUB :: (sda8)’ –class ubuntu –class gnu-linux –class gnu –class os $menuentry_id_option ‘gnulinux-simple-e150990b-5ae8-4f35-8d71-8118e682b5c7’ {
insmod gzio
insmod part_gpt
insmod ext2
set root=’hd0,gpt8′
if [ x$feature_platform_search_hint = xy ]; then
search –no-floppy –fs-uuid –set=root –hint-bios=hd0,gpt8 –hint-efi=hd0,gpt8 –hint-baremetal=ahci0,gpt8 e150990b-5ae8-4f35-8d71-8118e682b5c7
else
search –no-floppy –fs-uuid –set=root e150990b-5ae8-4f35-8d71-8118e682b5c7
fi
linux /boot/vmlinuz-4.12.0-12-exton root=UUID=e150990b-5ae8-4f35-8d71-8118e682b5c7 rw nomodeset
initrd /boot/initrd.img-4.12.0-12-exton
}

SCREENSHOTS
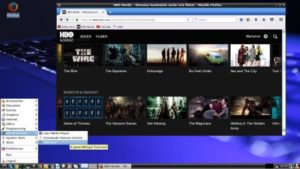
1. LFA Build 170827 running Firefox for Windows and HBO Movies
2. LFA Build 170827 running Wicd Preferences and sudo iwconfig
3. LFA Build 170827 running PlayOnLinux for installing Windows programs
4. LFA Build 170827 running Rufus and Wine
5. LFA Build 170827 running Samba to reach Windows computers
6. LFA Build 170827 running Google Chrome and Netflix

DOWNLOAD
This build of LFA has been replaced by Build 180504.

Other Exton Linux Systems you may like
All Exton Linux Systems

Read about my Android-x86 Systems – Oreo, Nougat, Marshmallow, Lollipop and KitKat at
andex.exton.net – latest is AndEX Oreo 8.1!
and
about my Nougat, Marshmallow and Lollipop versions for Raspberry Pi 3/2 at
raspex.exton.se – latest is RaspAnd Nougat 7.1.2!

LFA 64bit LINUX Live DVD Build 161114 – Create you own Linux For All/Ubuntu 16.10 live installable system!

lfa-refracta-desktop-screenshot-smallAbout Linux For All (LFA)
The system is based on Ubuntu 16.10, codenamed
Yakkety Yak and Debian testing (Stretch – upcoming Debian 9). It’s a total rebuild. I.e. nothing is left of the old LFA system.

The system language is ENGLISH.

NEWS 161114
A new upgraded version of LFA is out. All installed packages have been updated to the latest version as of 161114. Most important: I have included Refracta Tools so you can create your own Linux For All/Ubuntu live system!

More news about LFA build 161114
1. One of my previous versions of LFA (build 141120) had four (4) Desktop environments installed. Namely Unity (Ubuntu), LXDE, Razor-qt and XBMC. LFA build 161114 uses only Fluxbox as Window Manager and Cairo-Dock as Desktop Interface. Cairo-Dock is designed to be light, fast and customizable, and is desktop-agnostic. It has a powerful DBus interface, to be controlled from a terminal or another application. Features can be added by plug-ins or applets, and applets can be written in C or in any language. About Fluxbox: Fluxbox is a Window Manager for X that was based on the Blackbox 0.61.1 code. It is very light on resources and easy to handle but yet full of features to make an easy, and extremely fast, desktop experience. So who needs KDE or Gnome?

Screenshot of LFA’s new Desktop
Screenshot – Refracta Installer running

2. The LFA ISO is now a ISO-hybrid, which means that it can very easily be transferred (copied) to a USB pen drive. Read my USB INSTRUCTION about how to do it.
3. Another big improvement is that LFA now can run from RAM. Use Boot alternative 5 (load to RAM). It will look like this. When the system has booted up you can remove the disc (DVD) or USB stick. You’ll need at least 2 GB RAM to run LFA that way. I.e – superfast!
4. Kernel 4.4.0-19-exton is replaced by kernel 4.8.0-27-exton. (4.8.0-27 is the latest Ubuntu kernel). You can download “my” kernel if you want to use it in another Ubuntu/Debian system.
5. I have installed Nvidia’s proprietary graphics driver 370.28.
6. The best thing with this new LFA build – Create your own installable Ubuntu 16.10 Live DVD with Refracta tools (pre-installed)!

Program content etc

Among many other programs Google Chrome (so you can watch Netflix movies), GParted (
a free partition editor for graphically managing your disk partitions), BlueGriffon Web Editor (works almost like Dreamweaver), Synaptic Package Manager, SMPlayer (a free media player with built-in codecs that can play virtually all video and audio formats), FileZilla (so you can upload your own created Ubuntu ISO to your server) and PCManFM (a very fast file manager). In addition flash and all necessary additions in order to install programs from source. All programs have been updated to the latest available version as of November 14, 2016. See a complete list of all installed packages.

Important about Refracta
You can use the Refracta Tools (pre-installed in LFA Build 161114) to create your own installable Ubuntu Live DVD once you have installed LFA to hard drive. I mean change everything and then create a whole new Ubuntu 16.10 live system. When you start Refracta it will look like this. You don’t even have to install LFA to hard drive before you can use the Refracta tools. If you have plenty of RAM you can create a new (your own!) Ubuntu live installable system while running LFA from DVD or a USB stick. Please note that the whole Refracta process (creating your new ISO) will only take 5 – 10 min! You can then install VirtualBox in LFA so you can test run your own created new Ubuntu ISO. Or do it in Windows. Btw: You can do the whole thing in VirtualBox. I mean install LFA in VirtualBox, change everything, create a new Ubuntu 16.10 system using Refracta tools and transfer your new ISO to your server with FileZilla, which is pre-installed.

lfa-refracta-tools-running

Web based applications
In order to keep down the LFA system size (so you can run LFA superfast from RAM) I have refrained from installing LibreOffice and Gimp. Instead I offer links in Google Chrome to Onlyoffice.com (A Free alternative to Microsoft Office) and Pixlr.com (Photo Editor – works almost like Adobe Photoshop). Both apps are very easy to use.

Screenshot – Pixlr.com’s Photo Editor in use

Screenshot – Onlyoffice.com’s writer in use

Used KERNEL
My special kernel 4.8.0-27-exton.

What’s new in kernel 4.8?

PASSWORDS and login
The password for root is root. The password for the ordinary user live is live. When you start up LFA from the live dvd/USB stick you will end up in Fluxbox logged in as the ordinary user live. When/if you log out from Fluxbox you will come to Slim‘s login screen. Log in to Fluxbox again as root (if you want) with password root or as the ordinary user live with password live. When logged in as live you can use Sudo to become root. Command: sudo su. After a hard drive installation you can still log in to Fluxbox as root from Slim‘s login screen (if you want to). During the installation process (using Refracta Installer) you’ll get the chance to create your own ordinary user and also change the passwords.

lfa-slim-login

Using the Nvidia proprietary driver
If you want (and can) use Nvidia’s proprietary graphics driver 370.28 you shall boot up LFA using boot alternative 4 (Nomodeset). Then open up a terminal and run sudo nvidia-xconfig. Log out. If you can’t reach X/Fluxbox then your card isn’t supported. Delete xorg.conf with sudo rm /etc/X11/xorg.conf and run the command startx. Or reboot your computer. After a hard drive installation of LFA the open source driver Nouveau will be used, since it’s “built in” in the kernel. If you want and can use Nvidia’s proprietary graphics driver 370.28 you’ll have to run the command sudo nvidia-xconfig and restart your computer. You’ll also have to change /boot/grub/grub.cfg as this example shows.
menuentry ‘LFA :: GRUB :: (sda8)’ –class ubuntu –class gnu-linux –class gnu –class os $menuentry_id_option ‘gnulinux-simple-e150990b-5ae8-4f35-8d71-8118e682b5c7’ {
insmod gzio
insmod part_gpt
insmod ext2
set root=’hd0,gpt8′
if [ x$feature_platform_search_hint = xy ]; then
search –no-floppy –fs-uuid –set=root –hint-bios=hd0,gpt8 –hint-efi=hd0,gpt8 –hint-baremetal=ahci0,gpt8 e150990b-5ae8-4f35-8d71-8118e682b5c7
else
search –no-floppy –fs-uuid –set=root e150990b-5ae8-4f35-8d71-8118e682b5c7
fi
linux /boot/vmlinuz-4.8.0-27-exton root=UUID=e150990b-5ae8-4f35-8d71-8118e682b5c7 rw nomodeset
initrd /boot/initrd.img-4.8.0-27-exton
}

ABOUT WIRELESS configurations
Use Wicd to configure your wireless network. It works perfect. NOTE: Maybe you will have to change your network interfaces (eth0, wlan0) to for example eth1 and wlan1 in Wicd’s Preferences and click on the button Refresh before you can connect. Check your interfaces with the command sudo iwconfig. If you’re using a wired connection you may have to disconnect and reconnect. The  Network configuration can look like this.

Compatibility

Differences: Ubuntu 16.10 and LFA is different only in principle to the terms of program content. A general truth: If an original system can run on a particular computer an “Exton remaster” of the same original system can run on the same computer. I never change a Linux system for the worse in terms of auto configuration and hardware detection, etc. It happens that I replace the original kernel (which I have done in this case), but always to a “better” one with even more native support for various hardware etc.

Installation to hard drive
Note that you in advance (just in case) should create a partition of at least 8 GB for LFA and a SWAP space double the size of your computer’s RAM. I.e. if you have RAM of 1024 MB or less. If you have RAM of 2 GB or more it’s enough with a SWAP space of 2 GB. The installation program Refracta Installer in LFA is otherwise “intuitive”. Choose manual partitioning and select the partition you created in advance for installation. You’ll find the installation program under Menu (Cairo-Dock) >> System Tools >> Refracta Installer. NOTE: You should format your intended installation partition in advance. You can use GParted (installed in LFA) for that. Be sure to unmount all partitions before you start Refracta Installer.

USB installation
You should use UNetbootin in Windows or Linux. See a picture how it looks before the installation starts in Windows 10. There’s other ways to do it, but using UNetbootin is the best/safest way. However, if you want to install LFA to hard disk you will have to run the system from a DVD during installation. If you use Startup Disk Creator in Linux to transfer LFA to USB it is possible to install LFA to a hard drive later on from the USB stick. NOTE: Please read my INSTRUCTION about the best way to perform a USB installation.

Repositories and software management
LFA is totally compatible with Ubuntu 16.10 and therefore uses Ubuntu’s repositories. After a hard drive install of LFA you can go ahead an install any extra software you like and also upgrade the whole system. After running the command apt-get update you should use Synaptic Package Manager. NOTE: If you want to add repositories with a command (for example: sudo apt-add-repository ppa:kubuntu-ppa/backports) you’ll have change the first line in /etc/lsb-release to “DISTRIB_ID=Ubuntu“.

DOWNLOAD
This version of LFA has been replaced by version 170827.


Other Exton Linux Systems you may like

All Exton Linux Systems
Exton Systems for the Raspberry Pi computer
Exton Android Systems for PC