
Installation of LFA to a USB stick
(To perform the installations you must be root)
![]()
NEWS 250417
The LFA ISO is now a ISO-hybrid, which means that it can very easily be transferred (copied) to a USB pen drive. You can then even run LFA from the USB stick and save all your system changes on the stick. I.e. you will enjoy persistence!
A) “Normal” installation without persistence
LFA can be installed/transferred to a USB stick directly from the ISO file. It might be good to use this method if your computer lacks a CD/DVD drive, or if you just prefer to run Linux systems from a USB stick. This is the way to perform the installation:
1. Boot up a Linux system (Ubuntu or…) and download the ISO file lfa-24.04.2-64bit-budgie-nvidia-refractasnapshot-2430mb-250417.iso
2. Open up a terminal and cd to the folder where the ISO file is
3. Insert a USB stick and make sure which name it was given (/dev/sdb1 or /dev/sdc1 or …)
4. First run the command sudo isohybrid lfa-24.04.2-64bit-budgie-nvidia-refractasnapshot-2430mb-250417.iso
5. Then run the installation command sudo cp lfa-24.04.2-64bit-budgie-nvidia-refractasnapshot-2430mb-250417.iso /dev/sdb
6. Then run the command sync
Done!
7. Alternative installation command: sudo dd if=lfa-24.04.2-64bit-budgie-nvidia-refractasnapshot-2430mb-250417.iso of=/dev/sdb bs=4M
B) Installation with perfect persistence using the regular installation program Refracta Installer.
Do it like this:
1. Start up LFA from a DVD and log in as live.
2. Replace grub-efi-amd64 with grub-pc. I.e. run the command sudo apt install grub-pc
4. Insert a USB stick of 8GB, 16GB or 32GB and format the stick as ext4. Use GParted (installed in LFA) for that so you can be absolutely sure that the stick is known as /dev/sdb or /dev/sdc or…
5. Start Refracta Installer from Menu >> System Tools >> Refracta Installer.
6. Then choose your USB stick (/dev/sdb1, /dev/sdc1 or…) to install to and set the mount point to /. No need to format the stick again. Be sure not to choose /dev/sda (MBR) as “Device for boot loader installation”. The correct place is /dev/sdb, /dev/sdc or…I.e. on the stick – MBR. (And absolutely not on /dev/sdb1 or /dev/sdc1).
7. Again be sure to install the boot loader (Grub2) to the USB stick.
8. Follow the instructions.
After following the instructions 1 – 7 or 1 – 8:
Restart your computer with the USB stick in place and change the BIOS so that the computer in the first place is booting from the USB stick.
NOTE1: This way to transfer/install LFA to a USB stick works perfectly.
NOTE2: If the above described methods doesn’t work for you, you should try with another USB stick. (Another brand). All different versions of SanDisk are known to work very well. See also below. NOTE3: Do not use /dev/sda. (You will then delete the partition on which you probably have a Windows system).
NOTE4: You shall not write /dev/sdb1 or /dev/sdc1 (which is easy to believe).
Restart your computer with the USB stick in place and change the BIOS so that the computer in the first place is booting from the USB stick.
Error messages when running from USB
Common error message when trying to run LFA from an USB stick: (initramfs) mount: mounting /dev/loop0 on //filesystem.squashfs failed: Invalid argument. Can not mount /dev/loop0 (/cdrom/casper/filesystem.squashfs) on //filesystem.squashfs
Solution: Try with another USB stick (another brand). NOTE: It appears that not all USB sticks are suitable for topical purposes. I.e. they can not be made bootable. I myself have experience of brands Kingston DataTraveler, SanDisk Extreme USB 3.0 and Sony Micro Vault. The first two works (for me). You shall not use USB sticks of older model. They may work, but mostly bad. If you – after the installation of LFA to the USB stick – get different error messages (see above) when you try to run the system from the stick it is often because the stick is not “good enough”.
Alternative in Windows with some persistence
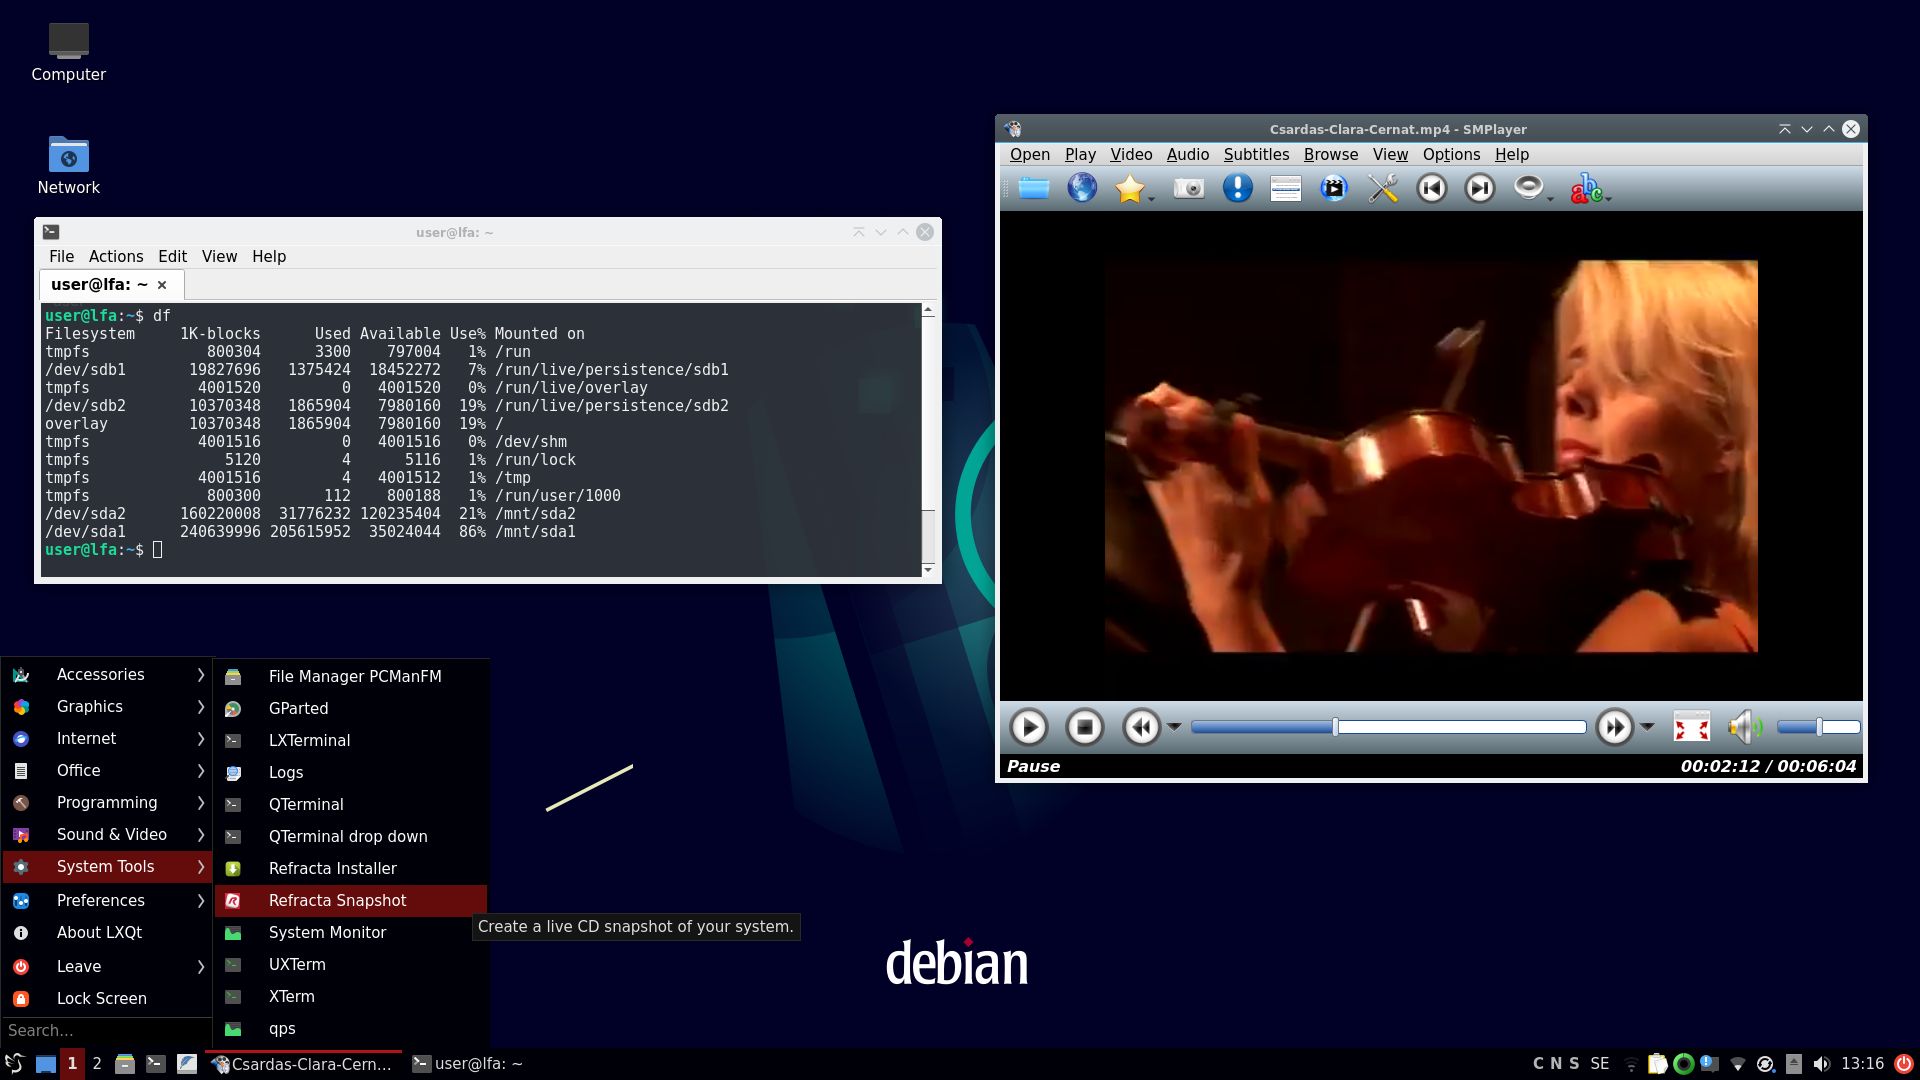
The installation can also be done in Windows with Rufus (Create bootable USB drives the easy way). Download Rufus. Rufus will recognize your inserted USB stick automatically (but check it carefully anyway). Find your downloaded ISO file and start Rufus. The created LFA USB stick with Rufus will work perfectly! Just restart your computer and have fun! Watch a screenshot when I’m running LFA from a USB stick after I’ve done some persistent changes. I’ve installed LXQt 0.17 as an alternative to Gnome 42.4. To be able to login to LXQt I had to change Display Manager from GDM3 to LightDM.
When running Rufus it will look like this.
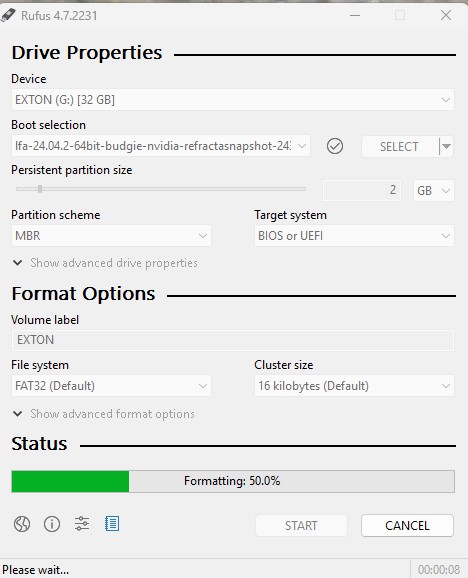
NOTE: As you can see I’ve decided to have a persistent partition of 2GB. According to my experience it works pretty well. Most of your system changes will be saved after a reboot. You can for example install LibreOffice without problems! Very big new program installations may fail. The best way to achieve persistence as regards LFA is still to follow my instructions above under B). Mostly because running from a USB stick with persistence enabled when using Rufus makes LFA running a bit slow.
IMPORTANT NOTE: As regards LFA Build 250417 I must say that using Rufus for persistence works very well. So you really don’t need Refracta Installer to achieve persistence!
BIOS settings
To be able to run your computer from the USB stick you’ll have to change the BIOS settings. For example from UEFI to Legacy boot. View this screenshot from one of my computers. As you can see I’m using SanDisk Cruzer Blade. Works very well (and you can buy it for about 9 $).
exton /250417
![]()