only fans leaksvisit pornflix.cc

LFA (Linux For All) 64bit Live System – Build 240718 – with Budgie DE 10.9.1, kernel 6.9.8-amd64-exton and Refracta Snapshot :: Create your own LFA/Ubuntu installable 24.04 LTS system!

Linux For All (LFA) Build 240718 with the Budgie 10.9.1 Desktop Environment is a simple remaster of Ubuntu 24.04 LTS, code-named Noble Numbat. It’s a total rebuild. I.e. nothing is left of the old LFA system. NOTE: Ubuntu 24.04 will be supported until August 2029.

NEWS ABOUT LFA Build 240718
1. All packages the ordinary Linux user can wish for are pre-installed. Study the full packages list…
2. Kernel 6.9.8-amd64-exton is used. You can of course switch to Ubuntu’s original kernel if you prefer that.

3. The Desktop environment is Budgie 10.9.1. (Budgie is a desktop environment, formerly a project within Solus, becoming independent under the newly formed Buddies of Budgie organization in January 2022. It uses GTK for widgets, and is written in C and Vala. As of Budgie 10, the only available session is on Xorg).
4. The main Web Browser is Firefox. So you can watch Netflix!
5. I have included Refracta tools (Refracta Snapshot) to make it possible for you to create your own installable Ubuntu 24.04 LTS Live System once you have installed LFA to hard drive.
6. You can run LFA super fast in RAM. Use boot alternative 2 Load to RAM – see below.

What’s new in kernel 6.9?

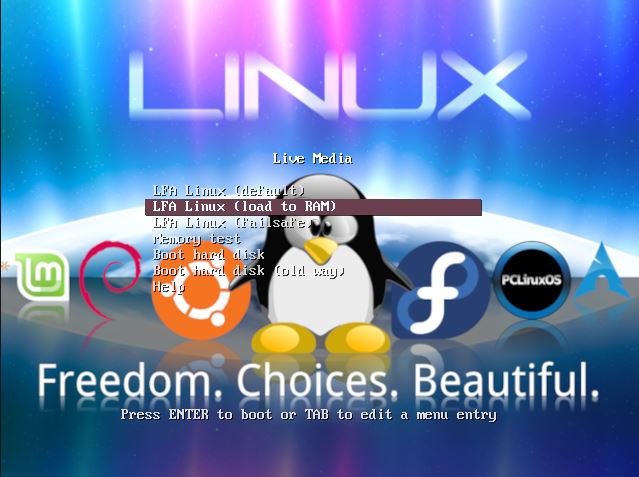
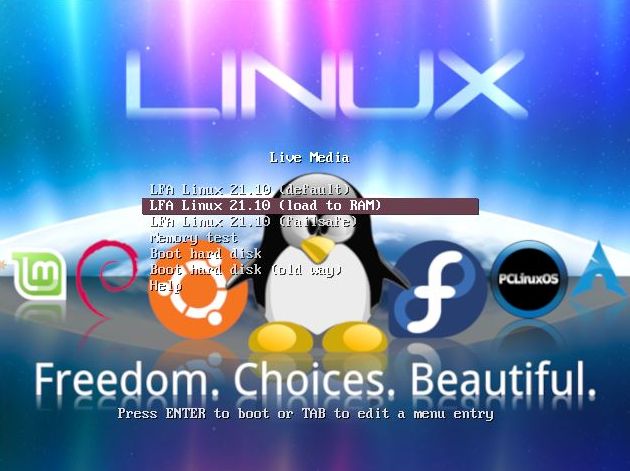
When booting up LFA from a DVD or a USB stick it will look like this.

Log in to the Budgie DE
When the boot process is ready you will end up LightDM‘s login screen. The password for the ordinary user user is live. You can only log in to Budgie as the ordinary user user. The password for root is root. When logged in as user you can use Sudo to become root. (Commands: sudo su and for example sudo pcmanfm).

LOG IN to Budgie as root
If you for some reason want to log in to Budgie as root you shall press Ctrl Alt F1 simultaneously. You will then leave X and be logged in as the user user in console mode. Run the following three commands: 1) sudo su 2) cd /root 3) startx

Installation to hard drive
Note that you in advance (just in case) should create a partition of at least 30 GB for LFA and a SWAP space double the size of your computer’s RAM. I.e. if you have RAM of 1024 MB or less. If you have RAM of 2 GB or more it’s enough with a SWAP space of 2 GB. The installation programs Calamares Installer and Refracta Installer in LFA is otherwise “intuitive”. Choose manual partitioning and select the partition you created in advance for installation. You’ll find the installation program under favorites to the left. NOTE: You should format your intended installation partition in advance. You can use GParted (installed in LFA) for that. Be sure to unmount all partitions before you start Refracta Installer. IMPORTANT NOTE: You should not trust Refracta Installer if you want to make an EFI installation. Only if you already have at least on Linux system installed on your computer (and already have one EFI partition). Please read my instruction
How To dual-boot, triple-boot or multi-boot Linux with Windows in a simple way and be happy. NOTE2: When installing LFA on a computer with no previous Linux system installed you should use Ubuntu’s installation program Ubiquity, which isn’t pre-installed in LFA. You can, however, install Ubiquity yourself with the command sudo apt install Ubiquity. When running said command it will look like this.

READ MORE about a hard drive install…

USB installation
Please read my INSTRUCTION about the best way to perform a USB installation. There are two ways to achieve persistence!

Important about Refracta
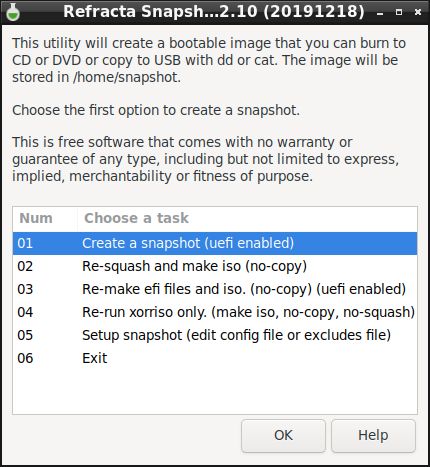
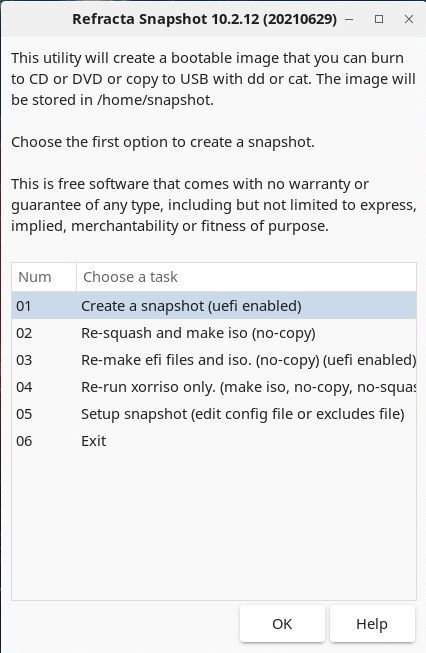
You can use the Refracta Snapshot (pre-installed in LFA Build 240718) to create your own installable Ubuntu 24.04  LTS Live System once you have installed LFA to hard drive. I mean change everything and then create a whole new Ubuntu live system. When you start Refracta Snapshot it will look like this. You don’t even have to install LFA to hard drive before you can use the Refracta Snapshot. If you have plenty of RAM you can create a new (your own!) Ubuntu live installable system while running LFA from DVD or a USB stick. I did that myself on a computer with 32GB RAM. I then started LFA in RAM before I started Refracta Snapshot. Please note that the whole Refracta Snapshot process (creating your new ISO) only will take 10 – 30 min! You can then install VirtualBox in LFA so you can test run your own created new Ubuntu ISO. Or do it in Windows. Btw: You can do the whole thing in VirtualBox. I mean install LFA in VirtualBox, change everything, create a new Ubuntu system using Refracta Snapshot and transfer your new ISO to your server with FileZilla or Samba. Or just copy your new ISO file to a USB stick. NOTE1: When using Refracta Snapshot while running LFA in VirtualBox the remaster process will take hours. When starting Refracta Snapshot it will look like the screenshot below.


ABOUT WIRELESS configurations
Use NetworkManager to configure your wireless network. It works perfect.

IMPORTANT NOTE about AMD/ATI Graphics Cards
On certain new computers with ATI/Radeon cards you may not be able to change the screen resolution when running LFA live. After a hard drive installation your Grub configuration should look like this example – see below.
menuentry ‘LFA 240718 (sda5 – Samsung_T5)’ –class ubuntu –class gnu-linux –class gnu –class os $menuentry_id_option ‘gnulinux-simple-5394828e-cee6-48a2-8d81-54c0c25f601b’ {
insmod part_msdos
insmod ext2
set root=’hd0,gpt5′
if [ x$feature_platform_search_hint = xy ]; then
search –no-floppy –fs-uuid –set=root 5394828e-cee6-48a2-8d81-54c0c25f601b
else
search –no-floppy –fs-uuid –set=root 5394828e-cee6-48a2-8d81-54c0c25f601b
fi
linux /boot/vmlinuz-6.9.8-amd64-exton root=UUID=5394828e-cee6-48a2-8d81-54c0c25f601b rw quiet acpi_backlight=vendor splash acpi_rev_override=1 nomodeset
initrd /boot/initrd.img-6.9.8-amd64-exton

KNOWN ISSUE
Using Calamares Installer the installation process will end showing an error message – screenshot. Just ignore the error and close down Calamares. Everything will be alright.

SCREENSHOTS
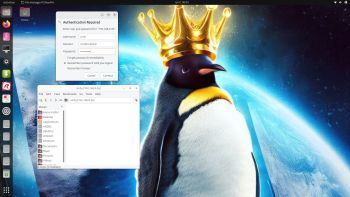
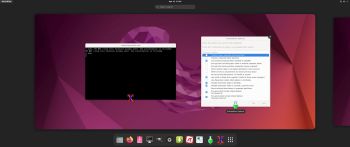
Screenshot 1 – The Desktop for user
Screenshot 2 – Calamares Installer is running
Screenshot 3 – Running LFA in VMware
Screenshot 4 – showing a WiFi connection
Screenshot 5 – Calamares Installer is ready for installation
Screenshot 6 – Refracta Installer is ready

Watch a YouTube Video about LFA…

DOWNLOAD
LFA Build 240718 can be downloaded from SourceForge.netFast, secure and free downloads from the largest Open Source applications and software director.

md5sum for the LFA  ISO which is of 1840 MB

Read about my Android-x86 Systems – 11, 10, Pie, Oreo, Nougat, Marshmallow, Lollipop and KitKat at
andex.exton.net – latest is AndEX 11 (with GAPPS), AndEX 10 (with GAPPS) and AndEX Pie 9.0 (also with GAPPS)!
and
about my Android 14, 13, 12, 11, 10, Pie, Oreo, Nougat, Marshmallow and Lollipop versions for Raspberry Pi 5, Pi 4 and  Pi 3/2 at
raspex.exton.se
– latest is RaspAnd 14 (with GAPPS), 13 and 12 (without GAPPS), RaspAnd 11 (with GAPPS) and RaspAnd Oreo 8.1
(also with GAPPS)!

LFA (Linux For All) 64bit Live System – Build 230608 – with Gnome 44 and kernel 6.4.0-rc4-amd64-exton :: Create you own LFA/Ubuntu installable 23.04 system!

Linux For All (LFA) Build 230608 with Gnome 44
is a simple remaster of Ubuntu 23.04, code-named Lunar Lobster. It’s a total rebuild. I.e. nothing is left of the old LFA system. NOTE: Ubuntu 23.04 will be supported (only) until January 2024. To be able to upgrade Gnome from version 42.4 to 44 I first had to upgrade Ubuntu from version 22.04 (supported until April 2027) to 23.04.

NEWS ABOUT LFA Build 230608

1. All packages the ordinary Linux user can wish for are pre-installed. Study the full packages list.
2. Kernel 6.4.0-rc4-amd64-exton is used. You can of course switch to Ubuntu’s original kernel if you prefer that.
3. The Desktop environment is Gnome 44. (Ubuntu’s original DE).
4. The main Web Browser is Firefox. So you can watch Netflix!
5. I have included Refracta tools (Refracta Snapshot) to make it possible for you to create your own installable Ubuntu 23.04 Live DVD once you have installed LFA to hard drive.
6. You can run LFA fast in RAM. Use boot alternative 2 Load to RAM – see below.
7. VirtualBox Guest Additions are pre-installed , which means (among other things) that you can run LFA in VirtualBox in full screen. Watch this screenshot.

What’s new in kernel 6.4?

When booting up LFA from a DVD or USB stick it will look like this.

Log in to Gnome 44
When the boot process is ready you will end up GDM:s login screen. The password for the ordinary user user is live. You can only log in to Gnome 44 as the ordinary user user. The password for root is root. When logged in as user you can use Sudo to become root. (Commands: sudo su and for example sudo pcmanfm).

Installation to hard drive
Note that you in advance (just in case) should create a partition of at least 20 GB for LFA and a SWAP space double the size of your computer’s RAM. I.e. if you have RAM of 1024 MB or less. If you have RAM of 2 GB or more it’s enough with a SWAP space of 2 GB. The installation program Refracta Installer in LFA is otherwise “intuitive”. Choose manual partitioning and select the partition you created in advance for installation. You’ll find the installation program under favorites to the left. NOTE: You should format your intended installation partition in advance. You can use GParted (installed in LFA) for that. Be sure to unmount all partitions before you start Refracta Installer. IMPORTANT NOTE: You should not trust Refracta Installer if you want to make an EFI installation. Only if you already have at least on Linux system installed on your computer (and already have one EFI partition). Please read my instruction
How To dual-boot, triple-boot or multi-boot Linux with Windows in a simple way and be happy. NOTE2: When installing LFA on a computer with no previous Linux system installed you should use Ubuntu’s installation program Ubiquity, which isn’t pre-installed in LFA. You can, however, install Ubiquity yourself with the command sudo apt install Ubiquity. When running said command it will look like this.

READ MORE about a hard drive install…

USB installation
Please read my INSTRUCTION about the best way to perform a USB installation. There are two ways to achieve persistence!

Important about Refracta
You can use the Refracta Snapshot (pre-installed in LFA Build 230608) to create your own installable Ubuntu 23.04 Live System once you have installed LFA to hard drive. I mean change everything and then create a whole new Ubuntu live system. When you start Refracta Snapshot it will look like this. You don’t even have to install LFA to hard drive before you can use the Refracta Snapshot. If you have plenty of RAM you can create a new (your own!) Ubuntu live installable system while running LFA from DVD or a USB stick. I did that myself on a computer with 32GB RAM. I then started LFA in RAM before I started Refracta Snapshot. Please note that the whole Refracta Snapshot process (creating your new ISO) only will take 10 – 30 min! You can then install VirtualBox in LFA so you can test run your own created new Ubuntu ISO. Or do it in Windows. Btw: You can do the whole thing in VirtualBox. I mean install LFA in VirtualBox, change everything, create a new Ubuntu system using Refracta Snapshot and transfer your new ISO to your server with FileZilla or Samba. Or just copy your new ISO file to a USB stick. NOTE1: When using Refracta Snapshot while running LFA in VirtualBox the remaster process will take hours. When starting Refracta Snapshot it will look like the screenshot below. NOTE2: VirtualBox Guest Additions are pre-installed , which means (among other things) that you can run LFA in VirtualBox in full screen. Watch this screenshot…

ABOUT WIRELESS configurations
Use NetworkManager to configure your wireless network. It works perfect.

IMPORTANT NOTE about AMD/ATI Graphics Cards
On certain new computers with ATI/Radeon cards you may not be able to change the screen resolution when running LFA live. After a hard drive installation your Grub configuration should look like this example – see below.
menuentry ‘LFA 230608 (sda5 – Samsung_T5)’ –class ubuntu –class gnu-linux –class gnu –class os $menuentry_id_option ‘gnulinux-simple-5394828e-cee6-48a2-8d81-54c0c25f601b’ {
insmod part_msdos
insmod ext2
set root=’hd0,gpt5′
if [ x$feature_platform_search_hint = xy ]; then
search –no-floppy –fs-uuid –set=root 5394828e-cee6-48a2-8d81-54c0c25f601b
else
search –no-floppy –fs-uuid –set=root 5394828e-cee6-48a2-8d81-54c0c25f601b
fi
linux /boot/vmlinuz-6.4.0-rc4-amd64-exton root=UUID=5394828e-cee6-48a2-8d81-54c0c25f601b rw quiet acpi_backlight=vendor splash acpi_rev_override=1 nomodeset
initrd /boot/initrd.img-6.4.0-rc4-amd64-exton

SCREENSHOTS
Screenshot 1 – Running Samba to reach Windows computers
Screenshot 2 – Refracta Installer has ended
Screenshot 3 – Running LFA in VMware
Screenshot 4 – Running in full screen in VirtualBox

Watch a YouTube Video about LFA…

DOWNLOAD
This LFA build has been replaced by Build 240718…

Read about my Android-x86 Systems – 11, 10, Pie, Oreo, Nougat, Marshmallow, Lollipop and KitKat at
andex.exton.net – latest is AndEX 11 (with GAPPS), AndEX 10 (with GAPPS) and AndEX Pie 9.0 (also with GAPPS)!
and
about my Android 14, 13, 12, 11, 10, Pie, Oreo, Nougat, Marshmallow and Lollipop versions for Raspberry Pi 5, Pi 4 and  Pi 3/2 at
raspex.exton.se
– latest is RaspAnd 14 (with GAPPS), 13 and 12 (without GAPPS), RaspAnd 11 (with GAPPS) and RaspAnd Oreo 8.1
(also with GAPPS)!

LFA (Linux For All) 64bit Live DVD Build 221008 with kernel 6.0.0-amd64-exton :: Create you own LFA/Ubuntu installable 22.04.1 LTS system!

Linux For All (LFA) Build 221008 with Gnome 42.4
is a simple remaster of Ubuntu 22.04, code-named Jammy Jellyfish. It’s a total rebuild. I.e. nothing is left of the old LFA system. NOTE: Ubuntu 22.04 will be supported until April 2027.

NEWS ABOUT LFA Build 221008

1. All packages the ordinary Linux user can wish for are pre-installed. Study the full packages list.
2. Kernel 6.0.0-amd64-exton (with Debian patches) is used. You can of course switch to Ubuntu’s original kernel if you prefer.
3. The Desktop environment is Gnome 42.4. (Ubuntu’s original DE).
4. The main Web Browser is Firefox. So you can watch Netflix!
5. I have included Refracta tools (Refracta Snapshot) to make it possible for you to create your own installable Ubuntu 22.04.1 Live DVD once you have installed LFA to hard drive.
6. You can run LFA fast in RAM. Use boot alternative 2 Load to RAM – see below. The LFA ISO file is of only 1490 MB to be compared with Ubuntu’s original ISO of 2900 MB.
7. VirtualBox Guest Additions are pre-installed , which means (among other things) that you can run LFA in VirtualBox in full screen. Watch this screenshot.

What’s new in kernel 6.0?

When booting up LFA from a DVD or USB stick it will look like this.

Log in to Gnome 42.4
When the boot process is ready you will end up logged in automatically to Gnome as the ordinary user user. The password for the ordinary user user is live. You can choose to log out from Gnome and log in again as root (super admin) from the Slim login screen. The password for root is root. When logged in as user you can use Sudo to become root. (Commands: sudo su and for example sudo pcmanfm).

Installation to hard drive
Note that you in advance (just in case) should create a partition of at least 20 GB for LFA and a SWAP space double the size of your computer’s RAM. I.e. if you have RAM of 1024 MB or less. If you have RAM of 2 GB or more it’s enough with a SWAP space of 2 GB. The installation program Refracta Installer in LFA is otherwise “intuitive”. Choose manual partitioning and select the partition you created in advance for installation. You’ll find the installation program under favorites to the left. NOTE: You should format your intended installation partition in advance. You can use GParted (installed in LFA) for that. Be sure to unmount all partitions before you start Refracta Installer. IMPORTANT NOTE: You should not trust Refracta Installer if you want to make an EFI installation. Only if you already have at least on Linux system installed on your computer (and already have one EFI partition). Please read my instruction
How To dual-boot, triple-boot or multi-boot Linux with Windows in a simple way and be happy. NOTE2: When installing LFA on a computer with no previous Linux system installed you should use Ubuntu’s installation program Ubiquity, which isn’t pre-installed in LFA. You can, however, install Ubiquity yourself with the command sudo apt install Ubiquity. When running said command it will look like this.

READ MORE about a hard drive install…

USB installation
Please read my INSTRUCTION about the best way to perform a USB installation. There are two ways to achieve persistence!

Important about Refracta
You can use the Refracta Snapshot (pre-installed in LFA Build 221008) to create your own installable Ubuntu 22.04.1 Live DVD once you have installed LFA to hard drive. I mean change everything and then create a whole new Ubuntu live system. When you start Refracta Snapshot it will look like this. You don’t even have to install LFA to hard drive before you can use the Refracta Snapshot. If you have plenty of RAM you can create a new (your own!) Ubuntu live installable system while running LFA from DVD or a USB stick. I did that myself on a computer with 32GB RAM. I then started LFA in RAM before I started Refracta Snapshot. Please note that the whole Refracta Snapshot process (creating your new ISO) only will take 10 – 30 min! You can then install VirtualBox in LFA so you can test run your own created new Ubuntu ISO. Or do it in Windows. Btw: You can do the whole thing in VirtualBox. I mean install LFA in VirtualBox, change everything, create a new Ubuntu system using Refracta Snapshot and transfer your new ISO to your server with FileZilla or Samba. Or just copy your new ISO file to a USB stick. NOTE1: When using Refracta Snapshot while running LFA in VirtualBox the remaster process will take hours. When starting Refracta Snapshot it will look like the screenshot below. NOTE2: VirtualBox Guest Additions are pre-installed , which means (among other things) that you can run LFA in VirtualBox in full screen. Watch this screenshot…

ABOUT WIRELESS configurations
Use NetworkManager to configure your wireless network. It works perfect.

SCREENSHOTS
Screenshot 1 – Installing Grub using Refracta Installer
Screenshot 2 – Running Samba to reach Windows computers
Screenshot 3 – Refracta Installer has started
Screenshot 4 – Running Refracta Installer and keeping the user account
Screenshot 5 – Running in full screen in VirtualBox

Watch a YouTube Video about LFA…

DOWNLOAD
LFA Build 221008 can be downloaded from SourceForge.netFast, secure and free downloads from the largest Open Source applications and software director.

md5sum for the LFA Gnome ISO which is of 1490 MB

Read about my Android-x86 Systems – 11, 10, Pie, Oreo, Nougat, Marshmallow, Lollipop and KitKat at
andex.exton.net – latest is AndEX 11 (with GAPPS), AndEX 10 (with GAPPS) and AndEX Pie 9.0 (also with GAPPS)!
and
about my Android 12, 11, 10, Pie, Oreo, Nougat, Marshmallow and Lollipop versions for Raspberry Pi 4 and 3/2 at
raspex.exton.se
– latest is RaspAnd 12 (without GAPPS), RaspAnd 11 (with GAPPS) and RaspAnd Oreo 8.1 (also with GAPPS)!


LFA (Linux For All) 64bit Live DVD Build 220412 with kernel 5.17.2-amd64-exton :: Create you own LFA/Ubuntu installable 22.04 LTS system!

Linux For All (LFA) Build 220412 with Gnome 42
is a simple remaster of upcoming Ubuntu 22.04, code-named Jammy Jellyfish. It’s a total rebuild. I.e. nothing is left of the old LFA system. NOTE: Ubuntu 22.04 will be supported until April 2027.

NEWS ABOUT LFA Build 220412

1. All packages the ordinary Linux user can wish for are pre-installed. Study the full packages list.
2. Kernel 5.17.2-amd64-exton (with Debian patches) is used. You can of course switch to Ubuntu’s original kernel if you prefer.
3. The Desktop environment is Gnome 42. (Ubuntu’s original DE).
4. The main Web Browser is Firefox. So you can watch Netflix!
5. I have included Refracta tools (Refracta Snapshot) to make it possible for you to create your own installable Ubuntu 22.04 Live DVD once you have installed LFA to hard drive.
6. You can run LFA fast in RAM. Use boot alternative 2 Load to RAM – see below. The LFA ISO file is of only 1470 MB to be compared with Ubuntu’s original ISO of 2900 MB.
7. VirtualBox Guest Additions are pre-installed , which means (among other things) that you can run LFA in VirtualBox in full screen. Watch this screenshot.

When booting up LFA from a DVD or USB stick it will look like this.

Log in to Gnome 42
When the boot process is ready you will end up logged in automatically to Gnome as the ordinary user user. The password for the ordinary user user is live. You can choose to log out from Gnome and log in again as root (super admin) from the Slim login screen. The password for root is root. When logged in as user you can use Sudo to become root. (Commands: sudo su and for example sudo pcmanfm).

Installation to hard drive
Note that you in advance (just in case) should create a partition of at least 20 GB for LFA and a SWAP space double the size of your computer’s RAM. I.e. if you have RAM of 1024 MB or less. If you have RAM of 2 GB or more it’s enough with a SWAP space of 2 GB. The installation program Refracta Installer in LFA is otherwise “intuitive”. Choose manual partitioning and select the partition you created in advance for installation. You’ll find the installation program under favorites to the left. NOTE: You should format your intended installation partition in advance. You can use GParted (installed in LFA) for that. Be sure to unmount all partitions before you start Refracta Installer. IMPORTANT NOTE: You should not trust Refracta Installer if you want to make an EFI installation. Only if you already have at least on Linux system installed on your computer (and already have one EFI partition). Please read my instruction
How To dual-boot, triple-boot or multi-boot Linux with Windows in a simple way and be happy. NOTE2: When installing LFA on a computer with no previous Linux system installed you should use Ubuntu’s installation program Ubiquity, which isn’t pre-installed in LFA. You can, however, install Ubiquity yourself with the command sudo apt install Ubiquity. When running said command it will look like this.

READ MORE about a hard drive install…

USB installation
Please read my INSTRUCTION about the best way to perform a USB installation. There are two ways to achieve persistence!

Important about Refracta
You can use the Refracta Snapshot (pre-installed in LFA Build 220412) to create your own installable Ubuntu 22.04 Live DVD once you have installed LFA to hard drive. I mean change everything and then create a whole new Ubuntu live system. When you start Refracta Snapshot it will look like this. You don’t even have to install LFA to hard drive before you can use the Refracta Snapshot. If you have plenty of RAM you can create a new (your own!) Ubuntu live installable system while running LFA from DVD or a USB stick. I did that myself on a computer with 32GB RAM. I then started LFA in RAM before I started Refracta Snapshot. Please note that the whole Refracta Snapshot process (creating your new ISO) only will take 10 – 30 min! You can then install VirtualBox in LFA so you can test run your own created new Ubuntu ISO. Or do it in Windows. Btw: You can do the whole thing in VirtualBox. I mean install LFA in VirtualBox, change everything, create a new Ubuntu system using Refracta Snapshot and transfer your new ISO to your server with FileZilla or Samba. Or just copy your new ISO file to a USB stick. NOTE1: When using Refracta Snapshot while running LFA in VirtualBox the remaster process will take hours. When starting Refracta Snapshot it will look like the screenshot below. NOTE2: VirtualBox Guest Additions are pre-installed , which means (among other things) that you can run LFA in VirtualBox in full screen. Watch this screenshot.

ABOUT WIRELESS configurations
Use NetworkManager to configure your wireless network. It works perfect.

SCREENSHOTS
Screenshot 1 – LFA Gnome running in VirtualBox
Screenshot 2 – Running Samba to reach Windows computers
Screenshot 3 – Refracta Installer has started
Screenshot 4 – Running Refracta Installer and installing Grub
Screenshot 5 – Running LFA Gnome from a USB stick after I’ve made some persistent changes
Screenshot 6 – root’s Desktop in Gnome

DOWNLOAD
This version of LFA has been replaced by Build 221008…

md5sum for the LFA Gnome ISO which is of 1470 MB

Read about my Android-x86 Systems – 10, Pie, Oreo, Nougat, Marshmallow, Lollipop and KitKat at
andex.exton.net – latest is AndEX 10 (with GAPPS) and AndEX Pie 9.0 (also with GAPPS)!
and

about my Android 12, 11, 10, Pie, Oreo, Nougat, Marshmallow and Lollipop versions for Raspberry Pi 4 and 3/2 at
raspex.exton.se
– latest is RaspAnd 12 (without GAPPS), RaspAnd 11 (with GAPPS) and RaspAnd Oreo 8.1 (also with GAPPS)!
LFA (Linux For All) 64bit Live DVD Build 211018 and 211021 :: Create you own LFA/Ubuntu installable 21.10 system!

Linux For All (LFA) Build 211018 with Gnome 40
is a simple remaster of Ubuntu 21.10, code-named Impish Indri, which was released 211014. It’s a total rebuild. I.e. nothing is left of the old LFA system.

NEWS ABOUT LFA Build 211021 WITH LXQt 0.17.0
I’ve made one extra version of LFA. This time with the LXQt Desktop Environment instead of Gnome 40. This version of LFA is for older non-EFI computers. LXQt is a lightweight Qt desktop environment. It will not get in your way. It will not hang or slow down your system. It is focused on being a classic desktop with a modern look and feel. LFA LXQt works in the same way as the Gnome version – see below. Study the full packages list.

NEWS ABOUT LFA Build 211018

1. All packages the ordinary Linux user can wish for are pre-installed. Study the full packages list.
2. Kernel 5.10.70-exton-amd64-rt53 (with Debian patches) is used. You can of course switch to Ubuntu’s original kernel if you prefer.
3. The Desktop environment is Gnome 40. (Ubuntu’s original DE).
4. The main Web Browser is Firefox. So you can watch Netflix!
5. I have included Refracta tools (Refracta Snapshot) to make it possible for you to create your own installable Ubuntu 21.10 Live DVD once you have installed LFA to hard drive.
6. You can run LFA fast in RAM. Use boot alternative 2 Load to RAM – see below. The LFA ISO file is of only 1300 MB to be compared with Ubuntu’s original ISO of 2900 MB.
7. VirtualBox Guest Additions are pre-installed , which means (among other things) that you can run LFA in VirtualBox in full screen. Watch this screenshot.

When booting up LFA from a DVD or USB stick it will look like this.

Log in to Gnome 40
When the boot process is ready you will end up at GDM3’s login screen. Log in as the ordinary user user with password live. You can’t log in to Gnome as root (super admin) from GDM3. The password for root is root. When logged in as user you can use Sudo to become root. (Commands: sudo su and for example sudo pcmanfm).

Installation to hard drive
Note that you in advance (just in case) should create a partition of at least 20 GB for LFA and a SWAP space double the size of your computer’s RAM. I.e. if you have RAM of 1024 MB or less. If you have RAM of 2 GB or more it’s enough with a SWAP space of 2 GB. The installation program Refracta Installer in LFA is otherwise “intuitive”. Choose manual partitioning and select the partition you created in advance for installation. You’ll find the installation program under favorites to the left. NOTE: You should format your intended installation partition in advance. You can use GParted (installed in LFA) for that. Be sure to unmount all partitions before you start Refracta Installer. IMPORTANT NOTE: You should not trust Refracta Installer if you want to make an EFI installation. Only if you already have at least on Linux system installed on your computer (and already have one EFI partition).  Please read my instruction
How To dual boot, triple boot or multi boot Linux with Windows in a simple way and be happy. NOTE2: When installing LFA on a computer with no previous Linux system installed you should use Ubuntu’s installation program Ubiquity, which isn’t pre-installed in LFA. You can, however, install Ubiquity yourself with the command sudo apt install Ubiquity. When running said command it will look like this.

READ MORE about a hard drive install…

USB installation
Please read my INSTRUCTION about the best way to perform a USB installation. There are two ways to achieve persistence!

Important about Refracta
You can use the Refracta Snapshot (pre-installed in LFA Build 211018) to create your own installable Ubuntu 21.10 Live DVD once you have installed LFA to hard drive. I mean change everything and then create a whole new Ubuntu live system. When you start Refracta Snapshot it will look like this. You don’t even have to install LFA to hard drive before you can use the Refracta Snapshot. If you have plenty of RAM you can create a new (your own!) Ubuntu live installable system while running LFA from DVD or a USB stick. I did that myself on a computer with 32GB RAM. I then started LFA in RAM before I started Refracta Snapshot. Please note that the whole Refracta Snapshot process (creating your new ISO) only will take 10 – 30 min! You can then install VirtualBox in LFA so you can test run your own created new Ubuntu ISO. Or do it in Windows. Btw: You can do the whole thing in VirtualBox. I mean install LFA in VirtualBox, change everything, create a new Ubuntu system using Refracta Snapshot and transfer your new ISO to your server with FileZilla or Samba. Or just copy your new ISO file to a USB stick.  NOTE1: When using Refracta Snapshot while running LFA in VirtualBox the remaster process will take hours. When starting Refracta Snapshot it will look like the screenshot below. NOTE2: VirtualBox Guest Additions are pre-installed , which means (among other things) that you can run LFA in VirtualBox in full screen. Watch this screenshot.

ABOUT WIRELESS configurations
Use NetworkManager to configure your wireless network. It works perfect.

SCREENSHOTS
Screenshot 1 – LFA Gnome running in VirtualBox
Screenshot 2 – Running Samba to reach Windows computers
Screenshot 3 – Refracta Installer has started
Screenshot 4 – Running Refracta Installer and installing Grub
Screenshot 5 – Running LFA Gnome from a USB stick after I’ve made some persistent changes
Screenshot 6 – Running Refracta Installer in LFA LXQt
Screenshot 7 – Installing Grub in MBR in LFA LXQt
Screenshot 8 – Running Spotify in LFA LXQt
Screenshot 9 – Running SMPlayer in LFA LXQt

DOWNLOAD
Find the new build of LFA here…


Read about my Android-x86 Systems – 10, Pie, Oreo, Nougat, Marshmallow, Lollipop and KitKat at
andex.exton.net – latest is AndEX 10 (with GAPPS) and AndEX Pie 9.0 (also with GAPPS)!
and

about my Android 11, 10, Pie, Oreo, Nougat, Marshmallow and Lollipop versions for Raspberry Pi 4 and 3/2 at
raspex.exton.se
– latest is RaspAnd 11 (with GAPPS) and RaspAnd Oreo 8.1 (also with GAPPS)!
LFA (Linux For All) 64bit Build 200607 with LXDE, TeamViewer, Google Chrome, Nvidia 400.82, Refracta Snapshot and kernel 5.7.0-exton

About Linux For All (LFA) Build 200607
The system is based on Ubuntu 20.04 LTS and Debian. It’s a total rebuild. I.e. nothing is left of the old LFA system.

Why Ubuntu 20.04 LTS?
Ubuntu 20.04 is supported until April 2025.

NEWS ABOUT LFA Build 200607

1. This is a BIG system (1670 MB). All packages the ordinary Linux user can wish for are pre-installed. Study the full packages list.
2. Kernel 5.7.0-exton is used.
3. I have installed Nvidia’s latest proprietary graphics driver 440.82.
4. The Desktop environment is LXDEDesigned to be user friendly and slim, while keeping the resource usage low.
5. The main Web Browser is Google Chrome. So you can watch Netflix! Another advantage with Google Chrome is that you will get all your bookmarks if you log in with your Gmail account.
6. I have included Refracta tools (Refracta Snapshot) to make it possible for you to create your own installable Ubuntu 20.04 LTS Live DVD once you have installed LFA to hard drive. This is done in the easiest possible way!
7. Use TeamViewer (pre-installed) to control your Windows computers from LFA. Or control LFA from your Windows computers.

What’s new in kernel 5.7?

Log in to LXDE
When the boot process is ready you will end up at LightDM’s login screen. Log in as the ordinary user live with password live. You can’t log in to LXDE as root (superadmin) from LightDM. The password for root is root. When logged in as live you can use Sudo to become root. (Command: sudo su). If you for some reason still want to run LFA as root you can do it by pressing Ctrl Alt F1 simultaneously. Log in as root with password root. Then run startx.

Using TeamViewer
Use TeamViewer (pre-installed) to control your Windows computers from LFA. Or control LFA from your Windows computers.
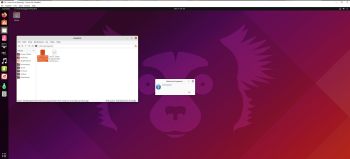
Screenshot 1 – LFA “running” Windows 10
Screenshot 2 – Windows 10 “running” LFA
How to use TeamViewer – A Complete Guide…

Installation to hard drive

Note that you in advance (just in case) should create a partition of at least 20 GB for LFA and a SWAP space double the size of your computer’s RAM. I.e. if you have RAM of 1024 MB or less. If you have RAM of 2 GB or more it’s enough with a SWAP space of 2 GB. The installation program Refracta Installer in LFA is otherwise “intuitive”. Choose manual partitioning and select the partition you created in advance for installation. You’ll find the installation program under Menu (LXDE) >> System Tools >> Refracta Installer. NOTE: You should format your intended installation partition in advance. You can use GParted (installed in LFA) for that. Be sure to unmount all partitions before you start Refracta Installer. READ MORE about a hard drive install…

USB installation
Please read my INSTRUCTION about the best way to perform a USB installation.

Important about Refracta
You can use the Refracta Snapshot (pre-installed in LFA Build 200607) to create your own installable Ubuntu 20.04 LTS Live DVD once you have installed LFA to hard drive. I mean change everything and then create a whole new Ubuntu live system. When you start Refracta Snapshot it will look like this. You don’t even have to install LFA to hard drive before you can use the Refracta Snapshot. If you have plenty of RAM you can create a new (your own!) Ubuntu live installable system while running LFA from DVD or a USB stick. Please note that the whole Refracta Snapshot process (creating your new ISO) will only take 10 – 30 min! You can then install VirtualBox in LFA so you can test run your own created new Ubuntu ISO. Or do it in Windows. Btw: You can do the whole thing in VirtualBox. I mean install LFA in VirtualBox, change everything, create a new Ubuntu system using Refracta tools and transfer your new ISO to your server with FileZilla or Samba. Or just copy your new ISO file to a USB stick. NOTE: In this LFA build you may have to use Refracta Snapshot in three steps before your new ISO is ready in /home/snapshot. See the first three (01 – 03) steps below.


Using the Nvidia proprietary driver

If you want (and can) use Nvidia’s proprietary graphics driver 440.82 you shall boot up LFA using boot alternative 4 (fail-safe). Then open up a terminal and run sudo nvidia-xconfig. Log out. NOTE: Maybe you don’t even have to run the command nvidia-xconfig. I.e. your Nvidia card will be used automatically. Check that by starting Nvidia X Server Settings under Menu (LXDE) >> Preferences. If you can’t reach X/LXDE after running nvidia-xconfig etc. your card isn’t supported. Delete xorg.conf with sudo rm /etc/X11/xorg.conf and run the command startx. Or reboot your computer.

SCREENSHOTS
Screenshot 1 – LFA running Windows 10 with TeamViewer
Screenshot 2 – Windows 10 running LFA with TeamViewer
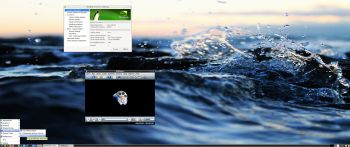
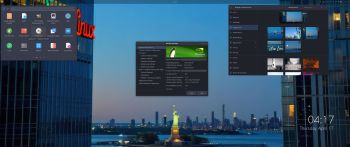
Screenshot 3 – Running Nvidia Settings
Screenshot 4 – Synaptic running
Screenshot 5 – LFA running in VMware
Screenshot 6 – LFA running in VirtualBox
Screenshot 7 – LFA running Samba to reach Windows computers

DOWNLOAD
This version of LFA has been replaced by version 211018…

Read about my Android-x86 Systems – 10, Pie, Oreo, Nougat, Marshmallow, Lollipop and KitKat at andex.exton.net – latest is AndEX 10 (with GAPPS) and AndEX Pie 9.0 (also with GAPPS)!
and
about my Android 11, 10, Pie, Oreo, Nougat, Marshmallow and Lollipop versions for Raspberry Pi 4 and 3/2 at raspex.exton.se – latest is RaspAnd 11 (with GAPPS) and RaspAnd Oreo 8.1 (also with GAPPS)!

LFA (Linux For All) 64bit Build 191111 with LXDE, TeamViewer, Google Chrome, Refracta Snapshot and kernel 5.4.0-rc6-exton

About Linux For All (LFA) Build 191111
The system is based on Ubuntu 18.04.3 LTS and Debian. It’s a total rebuild. I.e. nothing is left of the old LFA system.

Why Ubuntu 18.04.3 LTS?
Ubuntu 18.04 is supported until April 2023. Ubuntu 19.10 is supported until July 2020 only.

NEWS ABOUT LFA Build 191111

1. This is a very BIG system (2120MB). All packages the ordinary Linux user can wish for are pre-installed. Study the full packages list.
2. Kernel 5.4.0-rc6-exton is used.
3. I have installed Nvidia’s latest proprietary graphics driver 440.31.
4. The Desktop environment is LXDEDesigned to be user friendly and slim, while keeping the resource usage low.
5. The main Web Browser is Google Chrome. So you can watch Netflix! Another advantage with Google Chrome is that you will get all your bookmarks if you log in with your Gmail account.
6. I have included Refracta tools (Refracta Snapshot) to make it possible for you to create your own installable Ubuntu 18.04.3 LTS Live DVD once you have installed LFA to hard drive. This is done in the easiest possible way!
7. Use TeamViewer (pre-installed) to control your Windows computers from LFA. Or control LFA from your Windows computers.

What’s new in kernel 5.4?

Log in to LXDE
When the boot process is ready you will end up at LightDM’s login screen. Log in as the ordinary user live with password live. You can’t log in to LXDE as root (superadmin) from LightDM. The password for root is root. When logged in as live you can use Sudo to become root. (Command: sudo su). If you for some reason still want to run LFA as root you can do it by pressing Ctrl Alt F1 simultaneously. Log in as root with password root. Then run startx.

Using TeamViewer
Use TeamViewer (pre-installed) to control your Windows computers from LFA. Or control LFA from your Windows computers.
Screenshot 1 – LFA “running” Windows 10
Screenshot 2 – Windows 10 “running” LFA
How to use TeamViewer – A Complete Guide…

Installation to hard drive

Note that you in advance (just in case) should create a partition of at least 8 GB for LFA and a SWAP space double the size of your computer’s RAM. I.e. if you have RAM of 1024 MB or less. If you have RAM of 2 GB or more it’s enough with a SWAP space of 2 GB. The installation program Refracta Installer in LFA is otherwise “intuitive”. Choose manual partitioning and select the partition you created in advance for installation. You’ll find the installation program under Menu (LXDE) >> System Tools >> Refracta Installer. NOTE: You should format your intended installation partition in advance. You can use GParted (installed in LFA) for that. Be sure to unmount all partitions before you start Refracta Installer. READ MORE about a hard drive install…

USB installation
Please read my INSTRUCTION about the best way to perform a USB installation.

Important about Refracta
You can use the Refracta Snapshot (pre-installed in LFA Build 191111) to create your own installable Ubuntu 18.04.3 LTS Live DVD once you have installed LFA to hard drive. I mean change everything and then create a whole new Ubuntu live system. When you start Refracta Snapshot it will look like this. You don’t even have to install LFA to hard drive before you can use the Refracta Snapshot. If you have plenty of RAM you can create a new (your own!) Ubuntu live installable system while running LFA from DVD or a USB stick. Please note that the whole Refracta Snapshot process (creating your new ISO) will only take 10 – 30 min! You can then install VirtualBox in LFA so you can test run your own created new Ubuntu ISO. Or do it in Windows. Btw: You can do the whole thing in VirtualBox. I mean install LFA in VirtualBox, change everything, create a new Ubuntu system using Refracta tools and transfer your new ISO to your server with FileZilla or Samba. Or just copy your new ISO file to a USB stick.

Using the Nvidia proprietary driver

If you want (and can) use Nvidia’s proprietary graphics driver 440.31 you shall boot up LFA using boot alternative 4 (fail-safe). Then open up a terminal and run sudo nvidia-xconfig. Log out. NOTE: Maybe you don’t even have to run the command nvidia-xconfig. I.e. your Nvidia card will be used automatically. Check that by starting Nvidia X Server Settings under Menu (LXDE) >> Preferences. If you can’t reach X/LXDE after running nvidia-xconfig etc. your card isn’t supported. Delete xorg.conf with sudo rm /etc/X11/xorg.conf and run the command startx. Or reboot your computer.

SCREENSHOTS
Screenshot 1 – LFA “running” Windows 10 with TeamViewer
Screenshot 2 – Windows 10 “running” LFA with TeamViewer
Screenshot 3 – LFA running in VMware
Screenshot 4 – LFA running in VirtualBox
Screenshot 5 – Refracta Installer and Grub/efi
Screenshot 6 – LFA running Samba to reach Windows computers
Screenshot 7 – LFA running Google Chrome and Netflix
Screenshot 8 – TeamViewer setup in LFA
Screenshot 9 – Running Nvidia Settings

DOWNLOAD
This version of LFA has been replaced by version 200607…


LFA (Linux For All) 64bit Build 180504 with LXDE, TeamViewer, Google Chrome and Refracta tools

About Linux For All (LFA) Build 180504
The system is based on Ubuntu 18.04 LTS and Debian. It’s a total rebuild. I.e. nothing is left of the old LFA system.

NEWS ABOUT LFA Build 180504
1. This is a very BIG system (2020MB). All packages the ordinary Linux user can wish for are pre-installed. Study the full packages list.
2. Kernel 4.15.0-19-exton is used.
3. I have installed Nvidia’s latest proprietary graphics driver 390.48.
4. The Desktop environment is LXDEDesigned to be user friendly and slim, while keeping the resource usage low.
5. The main Web Browser is Google Chrome. So you can watch Netflix!
6. I have included Refracta tools (Refracta Snapshot) to make it possible for you to create your own installable Ubuntu 18.04 LTS Live DVD once you have installed LFA to hard drive. This is done in the easiest possible way!
7. Use TeamViewer (pre-installed) to control your Windows computers from LFA. Or control LFA from your Windows computers.

Log in to LXDE
When the boot process is ready you will end up at LightDM’s login screen. Log in as the ordinary user live with password live. You can’t log in to LXDE as root (superadmin) from LightDM. The password for root is root. When logged in as live you can use Sudo to become root. (Command: sudo su). If you for some reason still want to run LFA as root you can do it by pressing Ctrl Alt F1 simultaneously. Log in as root with password root. Then run startx.

Using TeamViewer
Use TeamViewer (pre-installed) to control your Windows computers from LFA. Or control LFA from your Windows computers.
Screenshot 1 – LFA “running” Windows 10
Screenshot 2 – Windows 10 “running” LFA
How to use TeamViewer – A Complete Guide…

Installation to hard drive

Note that you in advance (just in case) should create a partition of at least 8 GB for LFA and a SWAP space double the size of your computer’s RAM. I.e. if you have RAM of 1024 MB or less. If you have RAM of 2 GB or more it’s enough with a SWAP space of 2 GB. The installation program Refracta Installer in LFA is otherwise “intuitive”. Choose manual partitioning and select the partition you created in advance for installation. You’ll find the installation program under Menu (LXDE) >> System Tools >> Refracta Installer. NOTE: You should format your intended installation partition in advance. You can use GParted (installed in LFA) for that. Be sure to unmount all partitions before you start Refracta Installer.  READ MORE about a hard drive install…

USB installation
Please read my INSTRUCTION about the best way to perform a USB installation.

Important about Refracta
You can use the Refracta Tools (pre-installed in LFA Build 180504) to create your own installable Ubuntu 18.04 LTS Live DVD once you have installed LFA to hard drive. I mean change everything and then create a whole new Ubuntu live system. When you start Refracta it will look like this. You don’t even have to install LFA to hard drive before you can use the Refracta tools. If you have plenty of RAM you can create a new (your own!) Ubuntu live installable system while running LFA from DVD or a USB stick. Please note that the whole Refracta process (creating your new ISO) will only take 10 – 30 min! You can then install VirtualBox in LFA so you can test run your own created new Ubuntu ISO. Or do it in Windows. Btw: You can do the whole thing in VirtualBox. I mean install LFA in VirtualBox, change everything, create a new Ubuntu system using Refracta tools and transfer your new ISO to your server with FileZilla. Or just copy your new ISO file to a USB stick.

Using the Nvidia proprietary driver

If you want (and can) use Nvidia’s proprietary graphics driver 390.48 you shall boot up LFA using boot alternative 4 (fail-safe). Then open up a terminal and run sudo nvidia-xconfig. Log out. NOTE: Maybe you don’t even have to run the command nvidia-xconfig. I.e. your Nvidia card will be used automatically. Check that by starting Nvidia X Server Settings under Menu (LXDE) >> Preferences. If you can’t reach X/LXDE after running nvidia-xconfig etc. your card isn’t supported. Delete xorg.conf with sudo rm /etc/X11/xorg.conf and run the command startx. Or reboot your computer. After a hard drive installation of LFA the open source driver Nouveau will be used, since it’s “built in” in the kernel. If you want and can use Nvidia’s proprietary graphics driver 390.48 you’ll have to run the command sudo nvidia-xconfig and restart your computer. You’ll also have to change /boot/grub/grub.cfg as this example shows.
menuentry ‘LFA :: GRUB :: (sda8)’ –class ubuntu –class gnu-linux –class gnu –class os $menuentry_id_option ‘gnulinux-simple-e150990b-5ae8-4f35-8d71-8118e682b5c7’ {
insmod gzio
insmod part_gpt
insmod ext2
set root=’hd0,gpt8′
if [ x$feature_platform_search_hint = xy ]; then
search –no-floppy –fs-uuid –set=root –hint-bios=hd0,gpt8 –hint-efi=hd0,gpt8 –hint-baremetal=ahci0,gpt8 e150990b-5ae8-4f35-8d71-8118e682b5c7
else
search –no-floppy –fs-uuid –set=root e150990b-5ae8-4f35-8d71-8118e682b5c7
fi
linux /boot/vmlinuz-4.15.0-19-exton root=UUID=e150990b-5ae8-4f35-8d71-8118e682b5c7 rw nomodeset
initrd /boot/initrd.img-4.15.0-19-exton
}

SCREENSHOTS
Screenshot 1 – LFA “running” Windows 10 with TeamViewer
Screenshot 2 – Windows 10 “running” LFA with TeamViewer
Screenshot 3 – LFA running in VMware
Screenshot 4 – LFA running in VirtualBox
Screenshot 5 – Refracta Installer and Grub/efi
Screenshot 6 – LFA running Samba to reach Windows computers
Screenshot 7 – LFA running Google Chrome and Netflix

DOWNLOAD
This version of LFA has been replaced by Build 191111.


Read about my Android-x86 Systems – Pie, Oreo, Nougat, Marshmallow, Lollipop and KitKat at

andex.exton.net – latest is AndEX Pie 9.0 (with GAPPS) and AndEX Oreo 8.1 (also with GAPPS)!

and about my Pie, Oreo, Nougat, Marshmallow and Lollipop versions for Raspberry Pi 3/2 at
raspex.exton.se – latest is RaspAnd Pie 9.0 (without GAPPS) and RaspAnd Oreo 8.1 (with GAPPS)!

LFA (Linux For All) 64bit Build 170827 with Wine (for HBO Movies/Nordic), Google Chrome (for Netflix) and Refracta tools

lfa-big-firefox-hbo-running-smallAbout Linux For All (LFA) Build 170827
The system is based on Ubuntu 16.04.3 LTS and Debian Jessie. It’s a total rebuild. I.e. nothing is left of the old LFA system.

NEWS ABOUT LFA Build 170827
1. This is a very BIG system (2430MB). All packages the ordinary Linux user can wish for are pre-installed. Study the full packages list.
2. Kernel 4.12.0-12-exton (corresponding Kernel.org’s second latest stable kernel 4.12.8) is used. You can download “my” kernel and install it in another Ubuntu/Debian system (if you want).
3. I have installed Nvidia’s latest proprietary graphics driver 384.69.
4. The Desktop environment is LXDEDesigned to be user friendly and slim, while keeping the resource usage low.
5. The main Web Browser is Google Chrome. So you can watch Netflix!
6. I have installed Wine just to be able to install Firefox for Windows (which I have done). The Windows version is needed if you want to watch HBO Movies/HBO Nordic. The Pepper Flash plugin just doesn’t work anymore in Ubuntu. With Wine installed you can install many other Windows programs using PlayOnLinux. (Also pre-installed by me).
7. I have included Refracta tools (Refracta Snapshot) to make it possible for you to create your own installable Ubuntu (16.04.3/16.10/17.04/17.10) Live DVD once you have installed LFA to hard drive. This is done in the easiest possible way!

Log in to LXDE
When the boot process is ready you will end up at Slim‘s login screen. Log in as the ordinary user live with password live or as root (superadmin) with password root. When logged in as live you can use Sudo to become root. (Command: sudo su).

Installation to hard drive
Note that you in advance (just in case) should create a partition of at least 8 GB for LFA and a SWAP space double the size of your computer’s RAM. I.e. if you have RAM of 1024 MB or less. If you have RAM of 2 GB or more it’s enough with a SWAP space of 2 GB. The installation program Refracta Installer in LFA is otherwise “intuitive”. Choose manual partitioning and select the partition you created in advance for installation. You’ll find the installation program under Menu (LXDE) >> System Tools >> Refracta Installer. NOTE: You should format your intended installation partition in advance. You can use GParted (installed in LFA) for that. Be sure to unmount all partitions before you start Refracta Installer.

USB installation
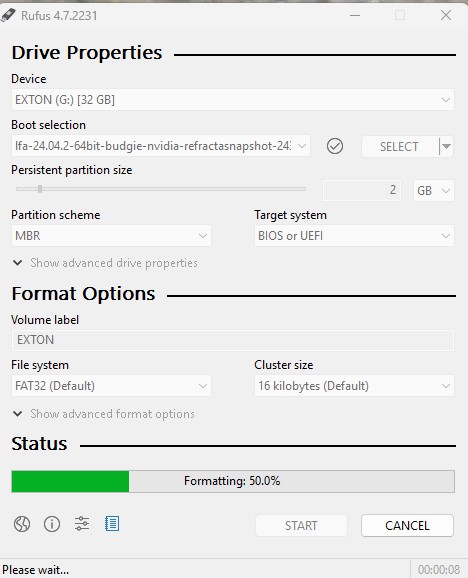
You should use UNetbootin in Windows or Linux. See a picture how it looks before the installation starts in Windows 10. There’s other ways to do it, but using UNetbootin is the best/safest way. However, if you want to install LFA to hard disk you will have to run the system from a DVD during installation. If you use Startup Disk Creator in Linux to transfer LFA to USB it is possible to install LFA to a hard drive later on from the USB stick. NOTE: Please read my INSTRUCTION about the best way to perform a USB installation.

Important about Refracta
You can use the Refracta Tools (pre-installed in LFA Build 170827) to create your own installable Ubuntu (16.04.3/16.10/17.04/17.10) Live DVD once you have installed LFA to hard drive. I mean change everything and then create a whole new Ubuntu live system. When you start Refracta it will look like this. You don’t even have to install LFA to hard drive before you can use the Refracta tools. If you have plenty of RAM you can create a new (your own!) Ubuntu live installable system while running LFA from DVD or a USB stick. Please note that the whole Refracta process (creating your new ISO) will only take 5 – 10 min! You can then install VirtualBox in LFA so you can test run your own created new Ubuntu ISO. Or do it in Windows. Btw: You can do the whole thing in VirtualBox. I mean install LFA in VirtualBox, change everything, create a new Ubuntu system using Refracta tools and transfer your new ISO to your server with FileZilla. Or just copy your new ISO file to a USB stick.

Using the Nvidia proprietary driver

If you want (and can) use Nvidia’s proprietary graphics driver 384.69 you shall boot up LFA using boot alternative 4 (Start in compatibility mode). Then open up a terminal and run sudo nvidia-xconfig. Log out. NOTE: Maybe you don’t even have to run the command nvidia-xconfig. I.e. your Nvidia card will be used automatically. Check that by starting Nvidia X Server Settings under Menu (LXDE) >> Preferences. If you can’t reach X/LXDE after running nvidia-xconfig etc. your card isn’t supported. Delete xorg.conf with sudo rm /etc/X11/xorg.conf and run the command startx. Or reboot your computer. After a hard drive installation of LFA the open source driver Nouveau will be used, since it’s “built in” in the kernel. If you want and can use Nvidia’s proprietary graphics driver 384.69 you’ll have to run the command sudo nvidia-xconfig and restart your computer. You’ll also have to change /boot/grub/grub.cfg as this example shows.
menuentry ‘LFA :: GRUB :: (sda8)’ –class ubuntu –class gnu-linux –class gnu –class os $menuentry_id_option ‘gnulinux-simple-e150990b-5ae8-4f35-8d71-8118e682b5c7’ {
insmod gzio
insmod part_gpt
insmod ext2
set root=’hd0,gpt8′
if [ x$feature_platform_search_hint = xy ]; then
search –no-floppy –fs-uuid –set=root –hint-bios=hd0,gpt8 –hint-efi=hd0,gpt8 –hint-baremetal=ahci0,gpt8 e150990b-5ae8-4f35-8d71-8118e682b5c7
else
search –no-floppy –fs-uuid –set=root e150990b-5ae8-4f35-8d71-8118e682b5c7
fi
linux /boot/vmlinuz-4.12.0-12-exton root=UUID=e150990b-5ae8-4f35-8d71-8118e682b5c7 rw nomodeset
initrd /boot/initrd.img-4.12.0-12-exton
}

SCREENSHOTS
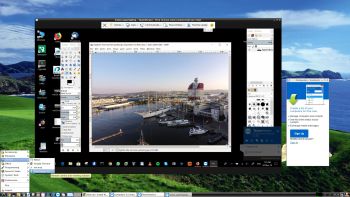
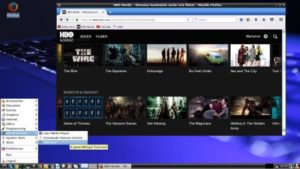
1. LFA Build 170827 running Firefox for Windows and HBO Movies
2. LFA Build 170827 running Wicd Preferences and sudo iwconfig
3. LFA Build 170827 running PlayOnLinux for installing Windows programs
4. LFA Build 170827 running Rufus and Wine
5. LFA Build 170827 running Samba to reach Windows computers
6. LFA Build 170827 running Google Chrome and Netflix

DOWNLOAD
This build of LFA has been replaced by Build 180504.

Other Exton Linux Systems you may like
All Exton Linux Systems

Read about my Android-x86 Systems – Oreo, Nougat, Marshmallow, Lollipop and KitKat at
andex.exton.net – latest is AndEX Oreo 8.1!
and
about my Nougat, Marshmallow and Lollipop versions for Raspberry Pi 3/2 at
raspex.exton.se – latest is RaspAnd Nougat 7.1.2!

LFA (Linux For All) 64bit Build 170121 with Wine (for HBO Movies/Nordic), Google Chrome (for Netflix) and kernel 4.9.5 (latest)

lfa-big-firefox-hbo-running-smallAbout Linux For All (LFA) Build 170121
The system is based on Ubuntu 16.04.1 LTS and Debian Jessie. It’s a total rebuild. I.e. nothing is left of the old LFA system.

NEWS ABOUT LFA Build 170121
1. This is a very BIG system (2020 MB). All packages the ordinary Linux user can wish for are pre-installed. Study the full packages list.
2. Kernel 4.9.0-15-exton corresponding Kernel.org’s latest stable kernel 4.9.5 is used. It was released yesterday (170120). You can download “my” kernel and install it in another Ubuntu/Debian system (if you want).
3. I have installed Nvidia’s latest proprietary graphics driver 375.26.
4. The Desktop environment is LXDEDesigned to be user friendly and slim, while keeping the resource usage low.
5. The main Web Browser is Google Chrome. So you can watch Netflix!
6. I have installed Wine just to be able to install Firefox for Windows (which I have done). The Windows version is needed if you want to watch HBO Movies/HBO Nordic. The Pepper Flash plugin just doesn’t work anymore in Ubuntu. With Wine installed you can install many other Windows programs using PlayOnLinux. (Also pre-installed by me).

Log in to LXDE
When the boot process is ready you will end up at Slim‘s login screen. Log in as the ordinary user live with password live or as root (superadmin) with password root. When logged in as live you can use Sudo to become root. (Command: sudo su).

Installation to hard drive
Note that you in advance (just in case) should create a partition of at least 8 GB for LFA and a SWAP space double the size of your computer’s RAM. I.e. if you have RAM of 1024 MB or less. If you have RAM of 2 GB or more it’s enough with a SWAP space of 2 GB. The installation program Refracta Installer in LFA is otherwise “intuitive”. Choose manual partitioning and select the partition you created in advance for installation. You’ll find the installation program under Menu (LXDE) >> System Tools >> Refracta Installer. NOTE: You should format your intended installation partition in advance. You can use GParted (installed in LFA) for that. Be sure to unmount all partitions before you start Refracta Installer.

USB installation
You should use UNetbootin in Windows or Linux. See a picture how it looks before the installation starts in Windows 10. There’s other ways to do it, but using UNetbootin is the best/safest way. However, if you want to install LFA to hard disk you will have to run the system from a DVD during installation. If you use Startup Disk Creator in Linux to transfer LFA to USB it is possible to install LFA to a hard drive later on from the USB stick. NOTE: Please read my INSTRUCTION about the best way to perform a USB installation.

Using the Nvidia proprietary driver

If you want (and can) use Nvidia’s proprietary graphics driver 375.26 you shall boot up LFA using boot alternative 4 (Start in compatibility mode). Then open up a terminal and run sudo nvidia-xconfig. Log out. NOTE: Maybe you don’t even have to run the command nvidia-xconfig. I.e. your Nvidia card will be used automatically. Check that by starting Nvidia X Server Settings under Menu (LXDE) >> Preferences.  If you can’t reach X/LXDE after running nvidia-xconfig etc. your card isn’t supported. Delete xorg.conf with sudo rm /etc/X11/xorg.conf and run the command startx. Or reboot your computer. After a hard drive installation of LFA the open source driver Nouveau will be used, since it’s “built in” in the kernel. If you want and can use Nvidia’s proprietary graphics driver 375.26 you’ll have to run the command sudo nvidia-xconfig and restart your computer. You’ll also have to change /boot/grub/grub.cfg as this example shows.
menuentry ‘LFA :: GRUB :: (sda8)’ –class ubuntu –class gnu-linux –class gnu –class os $menuentry_id_option ‘gnulinux-simple-e150990b-5ae8-4f35-8d71-8118e682b5c7’ {
insmod gzio
insmod part_gpt
insmod ext2
set root=’hd0,gpt8′
if [ x$feature_platform_search_hint = xy ]; then
search –no-floppy –fs-uuid –set=root –hint-bios=hd0,gpt8 –hint-efi=hd0,gpt8 –hint-baremetal=ahci0,gpt8 e150990b-5ae8-4f35-8d71-8118e682b5c7
else
search –no-floppy –fs-uuid –set=root e150990b-5ae8-4f35-8d71-8118e682b5c7
fi
linux /boot/vmlinuz-4.9.0-15-exton root=UUID=e150990b-5ae8-4f35-8d71-8118e682b5c7 rw nomodeset
initrd /boot/initrd.img-4.9.0-15-exton
}

SCREENSHOTS
1. LFA Build 170121 running Firefox for Windows and HBO Movies
2. LFA Build 170121 running Wicd Preferences and sudo iwconfig
3. LFA Build 170121 running Nvidia  Preferences and Synaptic
4. LFA Build 170121 running PlayOnLinux for installing Windows programs
5. LFA Build 170121 running Rufus and Wine
6. LFA Build 170121 running Samba to reach Windows computers
7. LFA Build 170121 running Google Chrome and Netflix

DOWNLOAD
This version of LFA has been replaced by version 170827.

Other Exton Linux Systems you may like
All Exton Linux Systems

Read about my Android-x86 Systems – Nougat, Marshmallow, Lollipop and KitKat at
andex.exton.net – latest is AndEX Nougat!
and
about my Nougat, Marshmallow and Lollipop versions for Raspberry Pi 3/2 at
raspex.exton.se – latest is RaspAnd Nougat!